Myra asked for a plate made from the botanical pattern fuser but I am going to make her one from the Spiral pattern fuser. Here it is.

And I will be using the same schedule as I fused for the botanical pattern fuser. Will fire the two pieces of 6 and 1/4 inch square glass, one being 6 and 2/8 square and the other being 6 and 3/8 square, first following the panel fuse information from Colour de Verre; then I will fire the finished piece using the following schedule
100dph......................................300 degrees hold 30 mins
150 dph......................................1250 degrees....................hold 30 mins
150 dph......................................1330 degrees....................hold 5 mins
Full...............................................900 degrees....................hold 1 hour
100dph..........................................600 degrees...................0ff
That worked out but one of the spirals in the center which happened to be on the red glass in center did not fuse as deeply as the other spirals. It is hardly noticeable but still, I will have to think about it. Before it was bubbles and then I used less heat. The guy from Coleur de verre said to use more glass and to use less heat. Maybe is should try a little more heat on the next one and use only one kind of glass. I already know that works best. And finally transparent works better than opaque, but I should still be able to do this with opaque.
THE LATEST TRY:
ON THE BOTANICAL PATTERN FUSER
I dont think it will be different on this one and my information confirms that,
But now the question is weight and heat work. This latest try is with amber transparent glass over clear glass. It weighs 13.5 ounces and so I did not add any heat and left the processing temperature at 1330 degrees.
So this time I will try two piece of clear glass, again not the full fill weight, but I do not see any reason why it should not work anyway and I will fuse the pre fired panel of blank glass on the botanical pattern fuser at 1340 processing temperature:
10 degrees more heat could make a big difference and I do understand that different colors work differently but hopefully this should tell me what i need to do.
"Understanding
that glasses have different viscosities – most often referred to as
hard and soft – can help in the choice of colours and styles of
glass to combine. Some glass will spread more, and also allow other
glass to sink deeper into the layer than others. It might help avoid
combining extremely hard and soft glasses next to each other.
It
should also help explain some results that were not planned. It may
help in when thinking about uneven slumps.
It
is important to recognise that glass chemistry is extremely
complicated, and to see that the expansion characteristics have to be
balanced with the viscosity characteristics as the two main elements
in compatibility. There are others, of course, but these appear to
the two main ones." Posted by Stephen Richard on his "Glass Tips" Blog
So here is the piece processed at 1340 degrees. It is hard to see because it is clear but almost the whole left side, perhaps about 1/3 of the whole piece did not fuse all the details.
So it this case it appears that less heat may have been better and maybe I should also try more glass. So I have two prefired pieces to go and I think I will add a third piece to it, if there is enough space and 3 layered piece of glass and see how that works.
So I will try the next one back at less heat 1330 degrees but hold it longer 5 more minutes with 2 different smaller pieces of prefired glass, both 2 layers of glass and 1 piece of 3 layers that I want to use in bigger projects. I want to see how the 3 layers of glass, one is thin 2mm glass, will do less heat and hold longer on the spiral pattern fuser.
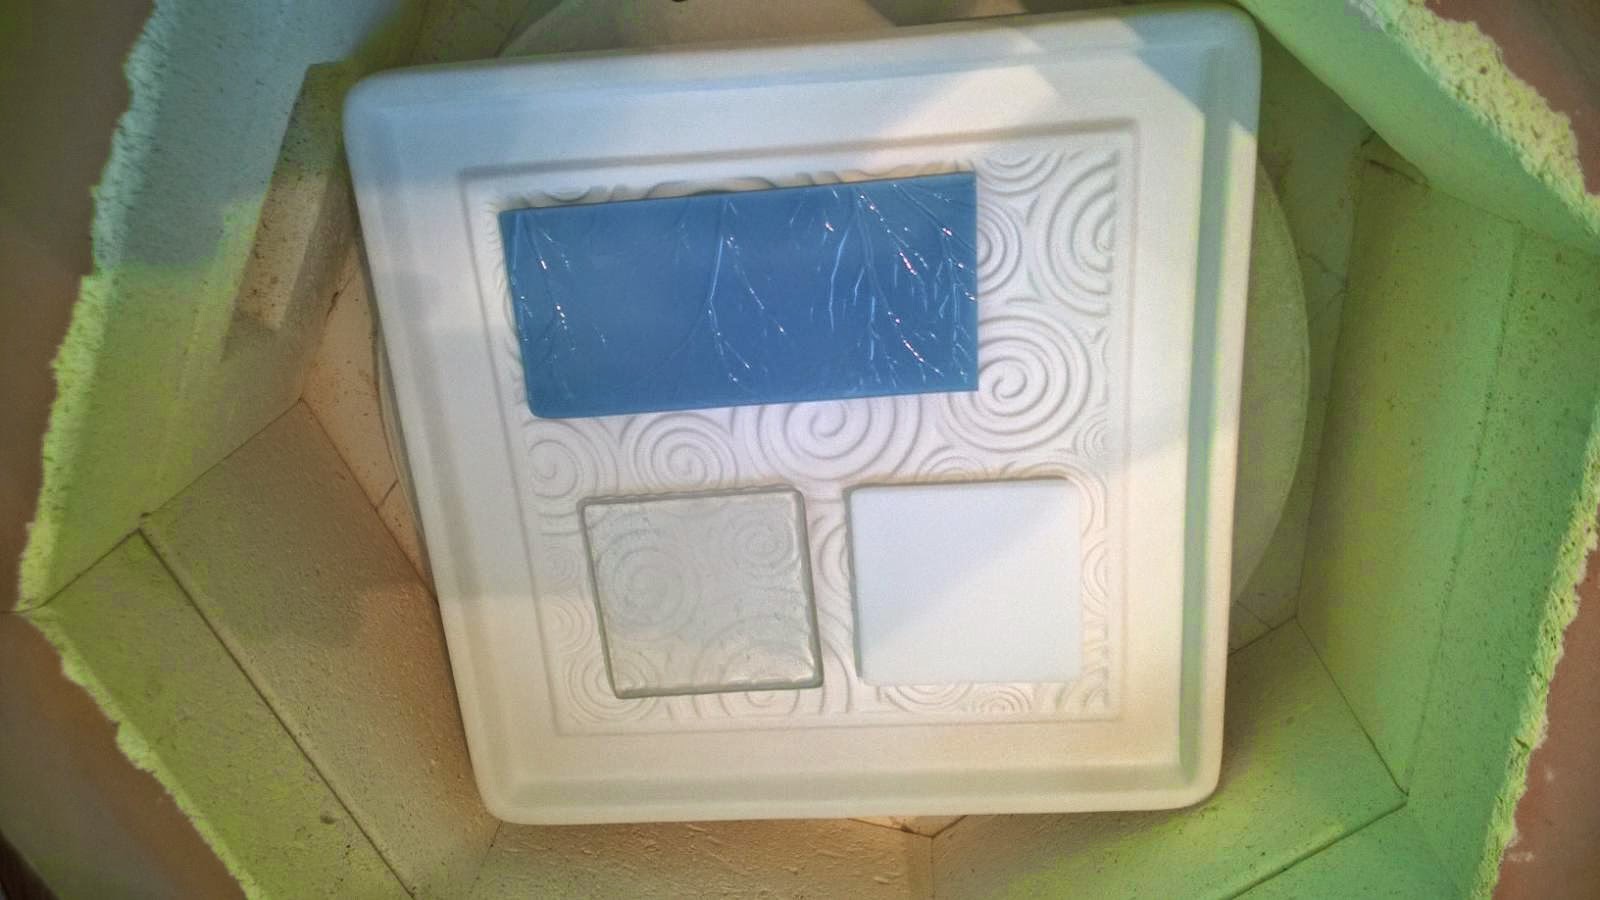
The 3 layered piece came out relatively well; the 2 layered aqua blue had a large spot which did not pick up the spirals and the irid piece came out the best. I thought it might have something to do with the placement of the glass on the kiln shelf and maybe perhaps unlevelness. So mark helped me make it more level and I will try a couple more pieces in it to test out that theory. Here are the results of the first experiments.:
Notice the flat spot in the aqua spiral pattern. This one was placed on the lower right hand side of the kiln. I am hoping that the problem was that the kiln was not as level as it could be. But I will try a couple more pieces on the pattern fuser and see if my supposition is correct.
Next experiment. We have leveled the kiln shelf and for the test i placed the blue piece in the area where I thought I was having problems from the shelf not being as level as possible.
So the blue piece of glass, which was previously fired over another pattern mold was placed in the lower right hand side. And I am also going to hold the processing temperature 5 minutes longer. And so that step will look like this:
150 dph ......................................1330 degrees..........................hold 10 mins
So this seems to have helped, leveling the kiln as much as possible, although I feel that the floor moves and the levelness probably or may change often. But for now it seems to have helped. So I will try another 6 1/4 inch square on the spiral pattern fuser using glass that I bought from Stained Glass Express which the label said was Emerald, Cl Frac Irid style BE11028A31F That seems to be a number series in the Irid or frac line but I could not find it on the Bullseye web site. Is that something that they no longer carry. I will look on the Stained Glass express website and see if I could get more there.
slump onto 6 1/2 square slumper with following firing schedule:
300 dph...................................1200 degrees......................................hold 5 mins
Full............................................900 degrees......................................hold 1 hour
100 dph......................................700 degrees......................................-0-
Full...............................................70 degrees......................................off