Wednesday, December 31, 2014

Pyramid Casting Mold 8948

Using Bullseye Mold Tips: Pyramid Casting Mold which offers the following firing schedule:

200dph.......................................1225 degrees........................hold 1 hour for frit, 2 hours for billet
600dph........................................1525 degrees.......................Hold 2 hours.  Instructions here are to visually inspect after 20 mins but I was unable to visually inspect for a number of reasons.
Full.............................................900 degrees..........................hold 1 hour
6 dph...........................................800 degrees..........................-0-
12 dph..........................................700 degrees..........................-0-
41 dph............................................70 degrees..........................-0-


Delphi Studio Pyramid Paper Weight MoldSo It came out okay, like the Bullseye tip sheet said "expect matte sides" and matte it was.  So looking around the internet I found a firing schedule for fire polishing the pyramid.  I am currently fire polishing it at the following schedule:

  • Fire Polishing: Because this piece is thick we need to proceed with caution. Firing too rapidly will cause your piece to crack. It is better to err on the side of caution! Place your piece into the kiln on a prepared kiln shelf. Using the SC2, I fire at Speed 2 or 200 degrees per hour to 1365 and hold for 10 minutes, then lower the temp as fast as possible to 960 and hold for 4 hours to anneal, then allow the kiln to cool to room temperature as fast as possible. This will take several hours.

DO NOT PEEK. DO NOT CRASH COOL. DO NOT OPEN THE KILN UNTIL THE TEMP IS 200 DEGREES OR BELOW. BE PATIENT OR YOUR PIECE WILL CRACK.

I got this firing schedule from a U Got Glass in Frankfort, Maine project sheet for a hemispheric paper weight.  We will see how it comes out.  Other times I have fire polished a piece I have not noticed any real difference, but hopefully the pyramid will be more shiny.  Additionally I have prepared another filled pyramid mold.  This time in contrast to the first where I used mostly all fine frit, I used hand made clear frit which includes all the various categories of frit, fine, medium coarse, and extra coarse.  Within all that clear frit I placed two shades of opaque blue and one shade of transparent green squares.  I placed two layers of the squares lying horizontally and one layer standing up on the outer layer of the pyramid, these will be towards the bottom once fired.  It will be interesting to see if one can see through the clear frit, if the colored opaque that in lying horizontally can be see at all and if the transparent green that is standing up on the outer surface of the pyramid closer to the bottom can be seen better.    


What flattened this out?  Former pyramid shape is now a flattened square, with a slightly raised center nodule.   Not much.  What happened?  Is it because I held it a 900 degrees for  3 hours.  Because I dont think that 1365 degrees is too hot and the hold at 1365 was only for 10 minutes.  Yet perhaps 1365 degrees was too hot.  I found a list of temperatures that put fire polishing between 1300 and 1325 degrees.  So next time I will lower the temperature significantly.
So I will try again to make another pyramid

So I heated the pyramid to 1520 instead of 1525 because even 5 degrees is supposed to make a difference and tomorrow I will try to fire polish it even though the first time I did that it flattened out.  This time I will take it to 1300 and hold it at 900 degrees for 2 hours, I will follow the schedule:

200dph.................................1300 degrees........................hold 10 mins
Full.........................................900 degrees                        hold 2 hours
off

And it came out.  See....


The second picture is after firepolishing.

Tuesday, December 2, 2014

CHRISTMAS ORNAMENTS

Christmas trees:  I made a few trees of various sizes, all lined with clear glass and covered with decorations. First I fired the triangular base using the Panel Fuse Schedule on the Colour de Verre instructions for a panel on which you place a snowflake.  I followed the following schedule:

300 dph...............................1265 degrees.........................30 minutes
300 dph................................1435 degrees.........................10 mins
Full.........................................900 degrees.........................60 mins
100 dph...................................600 degrees.........................off

This schedule worked well edges were smooth.  Then I covered it with some pieces of a snowflake that I had previously fused along with millefiore and used the Tack Fuse Schedule to tack fuse it on the panel:

250dph........................1215 degrees.......................30 minutes
250dph........................1315 degrees........................10 minutes
FULL............................900 degrees........................60 minutes
100dph...........................700 degrees........................off

And that worked except I tried to attach a bottom piece to it that did not connect.  I don't think that the edges were straight but I figured if the glass melted enough it would have attached better to that piece.

So now I am trying to make snowflakes and I put several together and then realized I did not have a firing schedule, so I put together a blank in which I used 2mm as well as 3mm glass.  So then this piece will be thinner than the piece I will ultimately do.  But there are several pieces of 1 1/2" squares that I have placed on each other and have fired it with the following schedule:

500 dph.......................1000 degrees................................15 minutes
Full .............................1400 degrees................................10 minutes
Full...............................900 degrees..................................1 hour
100 dph........................ 700 degrees......................................Off

Along with the blank snowflake I placed a small christmas tree ornament that I draped over a base piece and refired that at the above schedule.  We shall see how that works out.

Some of the squares in the ornament looks a little pulled on the sides.  That may have happened with the 22mm squares only.  No it is with the squares, at least some of the squares that overlap the other squares.   For this one I am going to try to not bring it up so high and hold it for less time.  So up to 1375 degrees and hold for 5 minutes only.  I will put only one in there and see how that works.  I will only use 3 mm clear glass squares for this experiment.

350dph.........................................1150 degrees......................................15 mins
450dph..........................................1375 degrees......................................5 mins
Full                                                 900 degrees.......................................1 hour
100dph............................................700 degrees......................................off

So now I think I have it. I will try one with colored glass at following schedule:

400dph..........................................1000 degrees........................10 mins
600dph...........................................1350 degrees.........................5 mins
Full..................................................900 degrees.........................60 mins
100 dph............................................700 degrees..........................off

More Christmas trees:

So I prefused the panel using the firing schedule from Colour de Verre Snowflake panel firing schedule and that works fine to put two pieces together.  Then I added cut up rod pieces and a base for the tree.  On the other tree I also added stringer along with cut up rod pieces and a base for the tree.  And I fused them using Bullseye tack fuse basic firing schedule as follows: 

300dph.....................................1000 degrees..............................hold 15 mins
600dph......................................1425 degrees..............................hold 10 mins
Full.............................................900 degrees..............................hold 1 hour
100dph........................................700 degrees..............................hold 1 min
off

And that worked.  Now I will try to drill a hold in two layers of glass using an 1/8 " drill bit and here we go. 

Now snowmen ornaments.  Got an easy idea off of the Delphi Glass catalog, "artist Kim Heenan" and did it my way  as you can see from the 2 pictures above. Used 3 piece of white glass, the head 1 inch square, the torso 1 1/2" square and the lower body 2" square, something like that.  Rod for eyes and buttons, stringer for nose and mouth.   I put fiber ropes behind their head and so their heads will have lumps.  I will fire them with the same schedule I used on the snowflakes:

400dph...........................1000 degrees.....................hold 10 mins
600dph...........................1350 degrees.....................hold 5 mins
Full..................................900 degrees......................hold 1 hour
100 dph...........................700 degrees......................hold 1 min
off

Thursday, October 23, 2014

SOAP DISH MOLD OCTOBER 2014

Round Leaf Soap Dish Mold I filled this mold with fine frit green mixed with tangerine etc and am currently firing it with the following schedule.  Wasnt sure  exactly how to use the mold.  Is it a slumping mold?   Or can I put scraps of glass in it and fuse?  Can I do both?  If I use it as a slump mold how do I take advantage of the two points of the leaf on the left and right of the picture?  Am I suppose to cut the glass to fit over that.  Cutting the glass to reflect the two points would be hard?  So is this a casting mold?  If so then it requires a lot of frit and I was unsure of that.  But I used it as a casting mold and filled it with fine frit of a mixture of colors and fired it as follows:

300dph..................................................1375 degrees................................10 min
Full..........................................................900 degrees.................................1 hour
100 dph....................................................700 degrees.................................off

Let's see how that works.  I understand that firing it low is best because you can always fire it again.  When firing I have also cleaned out my snowflake mold and will spray that with another layer of MR97 and fill it to fire tomorrow. 

That came out okay, two bubbles on the bottom side that set on the mold, and a few rough spot along the edges which maybe could have been taken care of or will be taken care of by fire polishing.  I will try it again but perhaps with glass to slump over.  

Sunday, October 5, 2014

SMALL SNOW FLAKE DISH

I put two 4 1/2 inch squares with blue transparent on top and clear on bottom.  One I placed with blue on top and the other the clear square was larger than the blue so I placed the clear piece on the top.  I followed the colour de verre firing schedule for a panel fuse which kept the temperature very low so they suggested grinding the corners before firing.  Well I did not do that, knowing my kiln burns hot and both squares came out fine with rounded corners.  In fact I liked the one with the bigger clear square on top because placed the other way it could have fired with a clear rim around the blue top and that would have not looked like what i wanted.  The only problem with the firing was that I had "blemishes" on the bottom of both squares.  I had placed them on thin fire paper because my shelf itself had some blemishes but did not expect that they would show through the paper, but in this firing they did.    Well I am going to go ahead with them anyway.  I placed a snow flake on each one of them.  A few edges of one of the snow flakes had broken off but i placed it on the square, as I did the other and applied some glue and here is what they looked like.  Once they dry i will replace my shelf with the other one I have, although it too has blemishes, and I will tack fuse the snow flake to the square.


Monday, September 22, 2014

CONTINUATION OF POT MELTS

Not sure of what I put in before or what happened but here is the result of my latest pot melt
Because of the uneven edges, which I have ground as well as I can, and because of some spikes on the surface of the melt, I am putting it through for another firing.  Used Delphi Firing Screen Melt 2nd Firing as follows:

225 dph.................................1050 degrees...................hold 20 ins
800 dph.................................1465 degrees...................hold 30 mins
full...........................................900 degrees...................hold 1 hour
150 dph............................,.......700 degrees...................hold 1 min
off

And it worked, the pits and spikes in the melt, along with the rough edges, however for the uneven sides I placed some mixed clear frit, pieces both large and small, on the edges and they fused into an even more uneven edge.  The clear base that that I placed there fused well but there may be some scum on the surface.  Not exactly sure what to do.  Should I try to save it, grind the clear uneven edges, soak it in vinegar to see if I can remove some of the scum.  If that does not remove it place it in for another firing to remove devit, or just put it in a box to be cut up at some later point and try again from the beginning.  Somehow I want to take this through to completion.  That seems like good practice and maybe I will learn something, so I will follow the above steps and then slump it.

To clear off the devit I covered the circle with a layer of clear powder and have put it back in kiln to fuse to 1410 with a hold of 20 mins.  once it comes out, it is pretty thick.  I can slump it and will try.


 This is the next pot melt, using blue and green transparent, along with what looks like amber transparent.  Am going to melt it into a square former which I have lined with fiber paper.

So this came out looking like this:

For the pot melt I used the following firing schedule
250 dph.....................................1100 degrees..........................hold 15 mins
450 dph......................................1680 degrees.........................hold 1 hour
Full.............................................1520 degrees.........................hold 15 mins
Full ............................................  900 degrees..........................hold 3 hours 
100dph..........................................800 degrees..........................hold 1 hour
100 dph.........................................650 degrees..........................hold 15 mins
off 
I simply changed it by not holding it 3 hours at 900 degrees and held it 2 hours instead.  This above piece could have benfited from more clear.  It is a little muddy and it had a spike and one corner of the glass looked like it had cracked some time earlier in the process.  So with all those potential areas that will not improve I am placing that in the kiln again and re firing it a 2nd time with the hope that the spike will smooth out, the sides repair themselves and the piece get a little thinner.   I am using the following firing schedule:

225 dph......................1100 degrees..........................hold 20 mins
800 dph.......................1465 degrees.........................hold 30 mins
Full ..............................900 degrees..........................hold 1 hour
300 dph........................ 350 degrees..........................Off

So here is what happened.  on the corner where the glass looked like it had cracked it was a lot worse
It is a mess and looks volcanic.

Wednesday, August 27, 2014

FULL FUSE SMALL ASHTRAY


Small, perhaps 3 1/2 inch square dish of red streaked clear glass over clear glass full fused and then slumped over this subtle pretty mold.   For this small piece I used the following schedule which was successful, schedule from Bullseye Glass: Firing: Basic Applications: Slump firings:

200dph..........................................................1200 degrees.............................Hold 10 mins
Full.................................................................900 degrees.............................Hold 1 hour
100 dph...........................................................700 degrees.............................Hold 1 min
Full....................................................................70 degrees.............................Hold 1 min
off

2nd experiment in full fusing and slumping:

Next, I am full fusing a 9 1/2 inch triangle of clear glass covered by white.  On the white glass I placed transparent blue streamers only on the outside for a slight subtle design.  After the fusing I hope to slump this on a basic triangular drop mold.  I am using the following schedule:
400dph...............................1250 degrees....................hold 30 mins
600dph................................1465degrees....................hold 10 mins
full........................................900degrees....................hold 30 mins
150dph..................................700degrees........................0
full............................................70degrees.....................off

The full fusing came out well.  The sides of the clear blank on the bottom were not completely straight, so the fused bottom looks a little weird.  I am currently slumping that triangular piece of glass into a a triangular mold which I have elevated on two inch kiln posts: 


Now I am just hoping that I coated the inside of the mold with kiln shelf release, otherwise it will stick to it as it drips through.  I used the following firing schedule to slump the piece:

200 dph...................................................1200 degrees.......................................hold 45 min.
Full ...........................................................900 degrees.......................................hold 1 1/2 hours
100 dph......................................................700 degrees......................................-0-
Full..............................................................70 degrees.......................................off


SUNCATCHERS

They are great and maybe I can make a few which will be beautiful in glass.  I have begun with two round disks of clear 3mm glass.  That is a real advance since prior to this I found it so difficult to cut circles.  But success and on the top of one I but brown and green pieces of glass to emulate the look of a tree.  Forgot to take a before picture but popped it in the kiln and fired it with the following schedule:

300 dph......................................1150 degrees..................................hold 30 mins
600 dph......................................1430 degrees..................................hold 12 mins
Full...............................................900 degrees..................................hold 1 hour
100 dph........................................ 700 degrees..................................hold 2 mins
Off.


Results to come:  Out of the kiln and I immediately see a small hairline crack in the glass.  After a little research I found the following:

• Small, interconnected cracks (like a spider web).
These cracks generally extend from a single spot on the underside of the glass. They aren't usually severe enough to cause the item to split into pieces. Sometimes shelf primer will also be stuck to the underside of the glass. Most likely, this kind of crack is caused by glass sticking to the kiln shelf. A close examination of the shelf may even reveal small pieces of glass that are stuck to the shelf. The obvious solution is to scrap the shelf clean and apply fresh kiln wash.

This makes sense and appears to be the problem.  I did notice a small tiny, piece of glass on shelf which I did not think much of, no more of that from now on.  I will be using thinline paper until I put fresh kiln wash on shelf.

Thursday, August 21, 2014

EXPERIMENTS WITH FLOW FUSING

I basically put 5 or 6 clear pieces of glass, most which were 3mm, and added stringers to one of them in the middle.  On top of that I placed two or three more layers of clear glass.  The sides were uneven and they were in pieces.  I placed them on fiber paper and dammed them are three sides with kiln furniture.  I placed fiber paper between the glass and the dams and elevated one of the sides so that the glass would flow towards the other side.  Then I fired it with the following schedule:

100 dph..................................300 degrees..........................................hold 15 mins
200 dph..................................600 degrees..........................................hold 15 mins
300 dph..................................1050 degrees........................................hold 15 mins
450 dph...................................1490 degrees........................................hold 15mins
 Full............................................900 degrees.......................................hold 2 hours
300 dph........................................700 degrees......................................hold 10 mins
off

Don't have any idea how it will all come out.  Really that is quite a few levels of glass, although not very big piece of glass, it might still take a long to melt it all.  I also don't know how the flow issue will work.  Bullseye has a tip sheet on working deep which I will take a closer look at.  We shall see what happens


So what I got was an uneven thick block where the stringer moved deep within.  I think I will look at Bullseye which seems to have a video on flow fusing and also a tip sheet on "working Deep"


Saturday, August 16, 2014

Experiment 3

I am currently fusing a piece of glass onto this carved piece of fiber board.  The glass is made up of two pieces.  see example below.  I created this piece by placing 2 pieces of blue on either side of the red piece and firing it shelf down and placing a white piece of glass as a base beneath it.  The design came out well, straighter than usual, so now I placed this piece on top of the carved fiber board 

300 dph..................................................1360 degrees..............................hold 20 mins
300 dph...................................................1465 degrees.............................hold 5 mins
Full............................................................900 degrees.............................hold 1 hour
100 dph......................................................700 degrees.............................hold 1 min
Off

So here is what I am considering, the circle around the celtic design is thin as are most of the other lines in the design.  Additionally the design where I carved them is uneven in the bottom.  I am wondering how this will effect the glass that is melting.


Thursday, July 31, 2014

MESH MELT, POT MELT


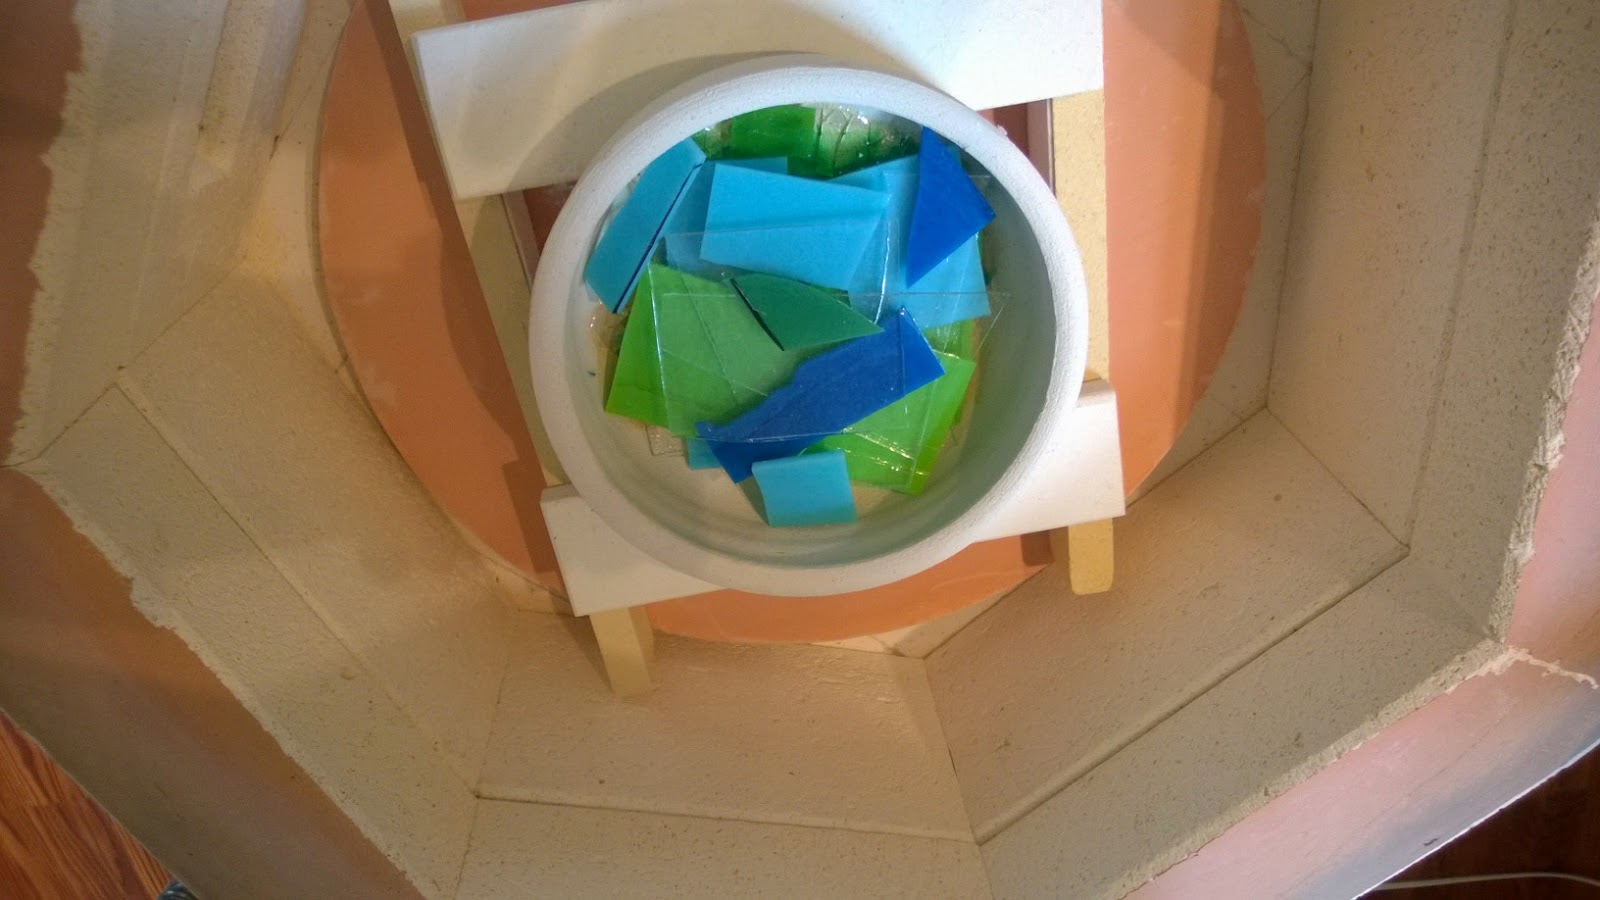
I made my own mesh using 1 inch thick fiber board with strips of 3/8th inch fiber papers strung across and secured by steel pins used in sewing.  I choose blue opaque with violet transparent and clear.  I used medium pieces of glass, going for big swaths of color, but I like it better with more mixing of colors and less separate blocks of color.  To fire it I used the following schedule:

500 dph...................................................1000 degrees..........................hold 30 mins
225 dph..................................................1225 degrees...........................hold 60 mins
Full..........................................................1595 degrees.........................hold 45 mins
Full..........................................................1475 degrees.........................hold 30 mins
Full............................................................900 degrees.........................hold 45 mins
100 dph......................................................700 degrees.........................off

The original firing schedule had me go up to 1600  degrees but I did 1595 instead.  You can see from the top picture that a lot of glass was still stuck to the mesh.  Additionally I had a few bubbles in the piece.  Thus I am not going to mess with original firing schedules until I try them first.  This piece was pretty, no black flakes in the glass from the stainless steel screen that I have.  I did knowingly use less glass than I was supposed to because I wanted to be conservative and so it came out a little uneven.  So I have ground the edges of the piece, it still isn't much of a circle and tomorrow I will fire polish it, using this schedule:
150 dph................................1000 degrees.................................hold 30 mins
Full.......................................1400 degrees.................................-0-
Full.........................................900 degrees.................................hold 60 mins
50 dph....................................800 degrees..................................-0-
100 dph..................................700 degrees..................................-0-
Off

and then I will add a layer of clear glass to the bottom, and fire it to a full fuse using a ramp of 100 dph for segment 1.  The firing schedule is as follows:

100 dph.................................................1000 degrees..........................hold 30 mins
225 dph..................................................1225 degrees.........................hold 60 mins
Full .......................................................1475 degrees..........................hold 20 mins
Full.........................................................900 degrees...........................hold 45 mins
50 dph.....................................................800 degrees..........................-0-
100 dph...................................................700 degrees..........................-0-
Off

Thank goodness for time to think.  I read my instructions over again and saw the steps for putting a transparent rim on your finished mesh melt.  The first step is to grind the piece after the melt to get rid of uneven edges.  The second step is to full fuse that piece on your piece of glass which is 1/2" larger than your piece and the third step would be to slump it, if that was the way you wanted to go.
I am currently fire polishing the piece after grinding its edges trying to see if the fire polish, which apparently works only on the surface, will get rid of the big bubbles which are now on the top of my piece.  If, as I am hoping, the fire polishing gets rid of the bubbles I will slump this piece and put a rim on my next piece.

It did not get rid of the bubbles, but serendipitously Stephen Richards wrote the following in his blog.  I hopte to remember this:

When using textured glass there is a decision to be made on whether the smooth or textured side is up.

"Oddly, the largest, but thin bubbles occur when putting the smooth sides together. it seems that as the glass is not perfectly flat, it holds air within the fused piece.

The fewest bubbles seem to be promoted by placing the rough side down on all pieces. This is easy as cutting is done on the smooth side anyway, and so no reverse cutting is required. It seems that the rough side of the glass provides ways for the air to escape during the bubble squeeze although it does promote micro bubbles within the glass.

If more bubbles are desired, you can place the textured sides together. That seems to allow the majority of the air out, but still leaves the micro bubbles from both sheets.

I have had good results following the Bullseye recommendation to keep the smooth side up on all layers. "
So finally after some deliberation I have decided to try and grind the piece a little longer and then slump it.  Results to come. 

Ok, the bubbles remained.   I have tried to grind it to a more perfect circle but it is quite far away from that so I will slump it in 
 6 x 1-3/4 Ball Surface Slumping MoldThis is relatively deep, so i will use a hold time of 15 mins.  Otherwise the schedule goes as follows:

150 dph..........................1000 degrees.......................hold 30 mins
100 dph.......................... 1200 degrees......................hold 15 mins
Full..................................900 degrees.......................hold 1 hour
50 dph..............................800 degrees.......................-0-
100 dph.............................700 degrees....................-0-
Off


 I have great hopes for this pot melt.  I broke down and bought some pots because these are only 2 inches high and so can be put on supports and still not be too high for my shallow kiln.  There are 6 holes and it is about a 6 1/2 inch diameter circle by 2 inches high.  I am putting a little over 10 ounces of blue and green transparent along with clear glass, elevated somewhat off the kiln shelf.  On the shelf I have a 6 1/2 inch diameter circle of clear glass 2mm thickness over thin fire paper.  My shelf's kiln wash is a little rough in some places and I did not want to re-coat it with kiln wash just now.  I will be using the following firing schedule tomorrow;

250 dph.....................................1100 degrees..........................hold 15 mins
450 dph......................................1680 degrees.........................hold 1 hour
Full.............................................1520 degrees.........................hold 15 mins
Full ............................................  900 degrees..........................hold 3 hours 
100dph..........................................800 degrees..........................hold 1 hour
100 dph.........................................650 degrees..........................hold 15 mins
off 

Pretty, but a corner of it broke off.  I think that was because it came in contact with one of the posts that was holding out the pot melt pot.  I will try to grind it down to a better shape, soak it in vinegar water, and fire polish it and then slump. 

NEXT POT MELT


  I fired it using the firing schedule on Bonny Dune Molds Pot Melt Tutorial and it came out well with only a few bubbles.  I wish I could get rid of those and will keep looking for some option.  Fired it as follows:

250 dph...............................1100 degrees.....................hold 15 mins
450 dph...............................1685 degrees......................hold 1 hour
That looks okay, the design came out better and now I put it over my cherry blossom mold.  I used the following firing schedule:  300dph..................1360 degrees...............hold 20 mins; 300dph..............1450 degrees...................hold 5 mins; Full.....................900 degrees....................hold 1 hour; 100dph.................700 degrees...........Off


4 Hot Patterns Ceramic Texture MoldCherry Blossom Texture Mold


                                                                                        So next i am fusing on the 4 pattern mold two rectangles of 3 1/2 inches by 7 inches; one has a bottom layer of clear 3mm covered by 3mm red transparent.  the other has 2 layers of clear 3mm covered by thin green transparent which will be a total of 8mm.  That versus the other thickness of 6mm.  So one of the issues I will look at will be how different thicknesses work at the same time.  I am  guessing not well, and I should have realized that but I did not think of it.  So I am firing this at:

300dph.....................1360 degrees ....................hold 20 mins
300dph......................1470 degrees                     hold 10 mins
Full...............................900 degrees...................hold 1 hour
100dph..........................700 degrees......................off             

    Rectangular Dish MoldI will be slumping it into a mold something like that.

The 8mm thick piece came out the best but I think overall that my problem has been too hot and holding too long and I should be doing one project at a time unless the two projects I do are exactly alike.  Armed with this information I am going to slump the 4 patterned texture CPI mold into a dish shape.  See above .  I will use a modified slump firing method as follows:

350dph.............................1100 degrees..............................hold 10 min
500 dph.............................1220 degrees     .........................5 min
Full....................................900 degrees................................1 hour
100 dph.............................700 degrees.............................off

The mold I am using is a little deeper than previous mold but the glass is heavier so hopefully it should all work.                                        

ADVANCED FUSING CLASS WITH LUCIE BOUCHER


Went to Waterville last Saturday and attended an advanced fusing glass taught by Lucie Boucher.  She was smart and funny and gave me quite a few ideas about new techniques to try.  I took pictures and will try to remember all the things she said.  :

The first picture is for the SMASH technique.  As you can see in the above picture, Lucie has placed several small pieces of colored glass over a round clear blank.  She placed that on a kiln shelf and placed small layers of fiber paper on the corners.  Over that she puts a shelf which is weighted down by kiln furniture.  And she fires it with the following schedule:

300dph......................................................1225 degrees...........................hold 3 hours
Full............................................................1500 degrees...........................hold 1 1/2 hours
Full..............................................................900 degrees...........................hold 2 hours
100dph........................................................700 degrees...........................off

Lucie said she broke her kiln shelves when she used this technique.  I tried to find this technique on the internet but was unsuccessful.  I didn't try searching with the term smash.  Will try now. No more information on this technique.  I guess I will have to try it myself.

 Above is example of kiln shelf on top of other kiln shelf with glass pieces on it.


This is most interesting.  I believe she called it Flow Fusing.  The first layer on bottom was 6mm clear; second layer was stringer and noodles; 3rd layer was 3mm clear.  She said it was 6 or 7 layers.  She put piece down on kiln shelf, but one side was elevated and during fusing the molten glass flowed to the lower side.  In fire polishing she went real slow; 20dph and held it at 1000 degrees for 4 hours.  She did cold working with a lap grinder, first using a 20 grit and working up to a 400 grit. 

The above image and following images are what I believe is a murrini maker.  I have a smaller version of that.  This one was steel which she lined with fiber paper. 

The above is working with fiber blanket to make a mold.  You place kiln furniture on the kiln shelf and toss the blanket on top of it, then place your glass over that.
Examples of all the pieces, the yellow dish using pattern pieces as well as the small blue dish and the piece furthest back, Lucie made with 1800 stringers.  Finally she talked about Hotline Mold Hardener.  Pour it on and press with a rolling pin.  Get it saturated.  Let it sit til its dry enough to cure in the kiln.  The advantage of this is that you can get a smoother surface than with the fiber blanket. 

All in all it was a wonderful class.  I enjoyed Lucie and she gave me lots and lots of information. 

Friday, July 25, 2014

FULL FUSING TWO LAYERS


I fused this 2 layer piece design down and placed a piece of white on top of it.  The bottom layer had 2 pieces of blue placed on either side of a small red piece.  All pieces were 3mm thickness.  The design side came out well, the three pieces appear to fit together precisely.  Often when i have tried to get all the pieces to fit together and placed them on top of the base it did not work so well.  Design down works.  Corners are round, sides smooth; all has fused together.  No extreme bulges on sides, however there is a slight bulge, hardly noticeable on the red edge.  Perhaps the red piece was a little longer than the surrounding blue pieces.  Regarding color, the blue and red are transparent.  By placing them on opaque white, the blue and the red become a little creamier looking.  i do not like the combination of the three colors and think that the white base is too much.  I would have preferred it with a clear base which I ma thinking would have continued the transparent aspects of the glass throughout the whole piece.

The firing schedule was as follows:

400 dph....................................1225 degrees....................hold 30 mins
600 dph.....................................1470 degrees....................hold 10 mins
Full...........................................900 degrees......................hold 1 hour
100 dph....................................700 degrees......................0
Full.............................................70 degrees........................off

Friday, July 18, 2014

Slumping botanical pattern mold and fighting Devitrification on smaller pattern mold

I continue to have a devit problem.  With the deeper pattern molds I have lowered the processing temperature and brought the hold tie way down low.  I can lower it even more and will try this when next I use the deep pattern mold.  But to begin today I am slumping an already completed piece.  I will use the following firing schedule:

200dph.............................1220 degrees.....................5 min
Full.....................................900 degrees.....................1 hour
100 dph...............................700 degrees....................Off

Once i finish slumping I am thinking of using the cherry blossom fuser again, with one layer of clear and then one layer of clear and red glass on top.  I changed my mind about using the red and clear glass.  Did another design of white mixed with a clear glass with red and brown and white stringers on it and I put clear glass as a base.  Thinking of full fusing the whole thing first and them putting it on the mold .  So I am full fusing layer of clear glass and another layer of several pieces(2pieces of white and one piece of clear with stringer glass) on the bottom.  I am placing it on the bottom to see if I can get a more fully fused piece with better lines.  Then after fusing I will put it on the cherry blossom mold and fuse that.

So I will be looking to see how the design and the mixture of the glass works when I put it on the bottom and full fuse it first.  Often when fusing a solid piece as the base and mixed pieces on top those pieces to not fit together very well and appear to have spaces.  Perhaps putting the mixed pieces on the bottom whilst fusing them will allow them to fit together better.  Tomorrow I will spray the cherry blossom pattern fuser and place the new double pieces fused today on top of it.  Lets hope it all works. 

Saturday, July 12, 2014

I love screen melts

So back from Florida, we had a great time, and I am once again looking at screen melts.  Following instructions in an e-book downloaded from Helios Kiln Glass Studio on Fused Glass Mesh & Trough Melts, I created the below piece of glass. 
The picture is a bit distorted, on its side, but the glass itself came out ok, unfortunately filled with black specs from the iron screen and a little uneven but good overall.  I am now fire polishing it to see if I can get rids of some of the little glass mountains on the top and smooth it out.  To fire polish I used the following firing schedule:

150dph.............................1000 degrees........................hold 30mins
Full...................................1400 degrees........................0 mins
Full.....................................900 degrees........................hold 60 mins
50dph..................................800 degrees........................0 min
100dph.................................725degrees........................0 min
0ff

So the fire polishing did not a huge job but I suppose that is a good thing.  There was a small rise or bump on the top of the piece and it somewhat modified that but it is still there.  Now I am going to slump it with the following firing schedule:

150dph.........................................1000 degrees.................................30mins
100dph..........................................1200 degrees..................................5mins
Full..................................................900 degrees.................................60mins
50..dph............................................800 degrees..................................0.
100 dph...........................................725degrees....................................0.
Off

There are several issues that I will be looking at here.  This slumping schedule, is quite different from the standard slumping schedule suggested by Bullseye.  I increased the 2nd step hold time to 5 minutes instead of 3 mins because it is a deep mold, but all of the slumping of the glass may have been taken care of in the hold time for step one which is 30 mins.  The other consideration is the unevenness of the piece itself.  Will that cause the finished piece to be unbalanced.  I bet it will.  Should I have put a border around it like discussed in the e-book.  I will look at that again and finally what about the black flecks and the little bump on the top.  What do I think about all those imperfections.

Monday, June 30, 2014

Creative Paradise, Inc. texture tiles molds.

I got a few of these texture mold from Delphi, they are lighter and in some cases less lines and design than the Colour de Verre molds that I have.  Their firing schedule is as follows.  It is faster and goes up higher than the Colour de Verre molds but seemingly works fine.  I did a few test pieces, mostly to test color and I think I prefer opaque glass on these.  Opaque helps you to more fully see the design of the mold in the glass.  Also I prefer not using frit, however I have only tried that on one of the molds, the Colour de Verre mold, but for now I will refrain.  Also on the test piece I used red opaque with a clear base.  That came out fine.  I used brown with black and ivory opaque with a clear base and that came out real pretty.
But now a mold from Creative Paradise Inc.
This is smaller, 8 3/4" by 8 3/4" and the design is not as pretty as the Colour de Verre molds but it might look nice.  I am fusing a red streaky piece of glass which has autumn colors in it as well on this mold along with a clear base.  I picked the red with the idea of having it look like a veined red maple leaf and I used the following firing schedule:

300dph.....1360 degrees....................hold 20 min
300dph.....1465 degrees...................hold 5 min
Full.............900 degrees...................hold 1 hour
100dph........700 degrees..................Off


 So this is how it came out, pretty soft red glass with veined leaf pattern.  I am currently slumping it into the mold which is 4 5/8th square.  Unfortunately I wound up cutting one side 5 inches long, so the glass itself is a little big for the slumping mold.  I hope this does not cause a problem.  I slumped a piece of glass that was a little bigger than its mold before and nothing too bad happened.  We shall see.

Well, out of the kiln it came and it slumped into the shape fine but the bottom of the piece was covered with what might have been devitrification.  I tried to polish it off with my diamond hand pads but was left with a few scratches on the bottom, which perhaps will come off with more finer polishing with the hand pads.  Mark suggest a felt bottom and I will check that out at Louis Does or in a sewing store when i go for pins

4 Hot Patterns Ceramic Texture MoldBefore moving on to some other things, full fusing flower parts and doing a screen melt, I am going to post pictures of the other texture molds that I have.  They are cool.


Spiral Pattern FuserBotanical Pattern FuserPeony Round Texture MoldSo after this is done I will scrape the kiln shelf of the kiln wash and recover it.  Perhaps I will have to use the other side.  Once covered I will do screen melts again following the information I received in Paul Tarlow's ebook.  I believe I can put a clear border around the piece to make it look more finished.  I used a mixture of blue transparent with a little purple transparent, some white and a bunch of clear.  Mark suggested doing more of the pattern pieces for the store in Newcastle and so I will.  In trying to clean off the mold, stupid me, I scraped the mold and so I will get some more, but the scratches on the bottom of the mold may add some character.  Lets hope.

This was done with the botanical mold.   and it came out fine, a really pretty pattern.  We see it now with white remnants of mold spray.  That comes off.  The other problem is that I stupidly added a clear piece which was much bigger than the brown piece of glass and that will have to be ground down before slumping it.  I also used the following schedule off of the Colour de Verre website.
100dph.........................................300 degrees....................hold 30 min
150dph.........................................1250 degrees.................hold 30 min
150 dph........................................1370 degrees............................hold 5 mins.    And here is where they gave me a range for the process temperature.  The range was from 1350 to 1400 degrees and I choose 1370 degrees.
Full.............................................900 degrees............................hold 1 hour
100 dph.......................................700 degrees............................Off

Once getting this clean I noticed a few spots that would not come off.  Probably some sort of devitrification, so the next firing will be an experiment.  I am using two piece of 3mm clear glass and I placed it on the spiral pattern fusing mold.  Deep spirals many different sizes, very pretty pattern.  I cleaned the glass carefully and I am also going to change the firing schedule.  I am lowering the processing temperature to 1355 degrees and holding that for 3 minutes.  Going to clean off my work table and make an extra effort to keep that area clean, putting paper down first and then the grate on which I cut the glass next.  I think that my kiln fires hot so perhaps this will help.  Also I put the mold on a 2 inch stand or kiln furniture even though they suggested 1 inch.  This will bring it closer to the heat but those pieces or stand were already in there and I left them in.  so this experiment will not be as valid as I could get.  My laziness is a problem.  But lets just see.


So as you can see it came out pretty well except for lots if what appears to be bubbles or flecks of glass, but it does not look bad it kind of looks good.  I do not know exactly what this means because I read yesterday that devit is often in dark opaque glass and in this experiment I used clear.  I guess the best experiment will be on dark opaque with the temperature I used in this firing.  I slumped it and it came out ok.

 The next experiment will be with a dark opaque glass with clear on the bottom and using the firing schedule that I used for the above.  In between this I tried to fire polish a screen melt and it did not quite work.  That was the second time I tried a fire polish schedule for that piece and the first time the kiln did not complete the full schedule and it stopped with error message PF2.  But my next project will be another attempt at the botanical pattern melt and if that works then I will assume that there may be some problem with the glass.

Well, it came out a little better but it still had parts which look like as Mark describes them "dusty".  I had fewer of these spots than the previous ones.  Perhaps I can only use clear or transparent glass on these deeper molds.  For the next experiment after I slump this blue piece will be too use a smaller less deep mold.


Cherry Blossom Texture MoldSo the next one will use this mold with the following firing schedule:

300 dph.............................1360 degrees........................hold 20 mins
300 dph..............................1465 degrees.......................hold 10 mins
Full.......................................900 degrees......................hold 1 hour
100 dph.................................700 degrees.....................off

Again, because I am not covering the whole mold, only using a portion of it I will lower the processing temperature to 1455 degrees and hold for 5 mins.  Again, since this mold is not as deep or heavy and It is not held for such a long time or goes up to its processing temperature as quickly, I will try it with an opaque glass but see if I can find a light colored opaque on the bottom of which I will put clear.