Monday, June 30, 2014

Creative Paradise, Inc. texture tiles molds.

I got a few of these texture mold from Delphi, they are lighter and in some cases less lines and design than the Colour de Verre molds that I have.  Their firing schedule is as follows.  It is faster and goes up higher than the Colour de Verre molds but seemingly works fine.  I did a few test pieces, mostly to test color and I think I prefer opaque glass on these.  Opaque helps you to more fully see the design of the mold in the glass.  Also I prefer not using frit, however I have only tried that on one of the molds, the Colour de Verre mold, but for now I will refrain.  Also on the test piece I used red opaque with a clear base.  That came out fine.  I used brown with black and ivory opaque with a clear base and that came out real pretty.
But now a mold from Creative Paradise Inc.
This is smaller, 8 3/4" by 8 3/4" and the design is not as pretty as the Colour de Verre molds but it might look nice.  I am fusing a red streaky piece of glass which has autumn colors in it as well on this mold along with a clear base.  I picked the red with the idea of having it look like a veined red maple leaf and I used the following firing schedule:

300dph.....1360 degrees....................hold 20 min
300dph.....1465 degrees...................hold 5 min
Full.............900 degrees...................hold 1 hour
100dph........700 degrees..................Off


 So this is how it came out, pretty soft red glass with veined leaf pattern.  I am currently slumping it into the mold which is 4 5/8th square.  Unfortunately I wound up cutting one side 5 inches long, so the glass itself is a little big for the slumping mold.  I hope this does not cause a problem.  I slumped a piece of glass that was a little bigger than its mold before and nothing too bad happened.  We shall see.

Well, out of the kiln it came and it slumped into the shape fine but the bottom of the piece was covered with what might have been devitrification.  I tried to polish it off with my diamond hand pads but was left with a few scratches on the bottom, which perhaps will come off with more finer polishing with the hand pads.  Mark suggest a felt bottom and I will check that out at Louis Does or in a sewing store when i go for pins

4 Hot Patterns Ceramic Texture MoldBefore moving on to some other things, full fusing flower parts and doing a screen melt, I am going to post pictures of the other texture molds that I have.  They are cool.


Spiral Pattern FuserBotanical Pattern FuserPeony Round Texture MoldSo after this is done I will scrape the kiln shelf of the kiln wash and recover it.  Perhaps I will have to use the other side.  Once covered I will do screen melts again following the information I received in Paul Tarlow's ebook.  I believe I can put a clear border around the piece to make it look more finished.  I used a mixture of blue transparent with a little purple transparent, some white and a bunch of clear.  Mark suggested doing more of the pattern pieces for the store in Newcastle and so I will.  In trying to clean off the mold, stupid me, I scraped the mold and so I will get some more, but the scratches on the bottom of the mold may add some character.  Lets hope.

This was done with the botanical mold.   and it came out fine, a really pretty pattern.  We see it now with white remnants of mold spray.  That comes off.  The other problem is that I stupidly added a clear piece which was much bigger than the brown piece of glass and that will have to be ground down before slumping it.  I also used the following schedule off of the Colour de Verre website.
100dph.........................................300 degrees....................hold 30 min
150dph.........................................1250 degrees.................hold 30 min
150 dph........................................1370 degrees............................hold 5 mins.    And here is where they gave me a range for the process temperature.  The range was from 1350 to 1400 degrees and I choose 1370 degrees.
Full.............................................900 degrees............................hold 1 hour
100 dph.......................................700 degrees............................Off

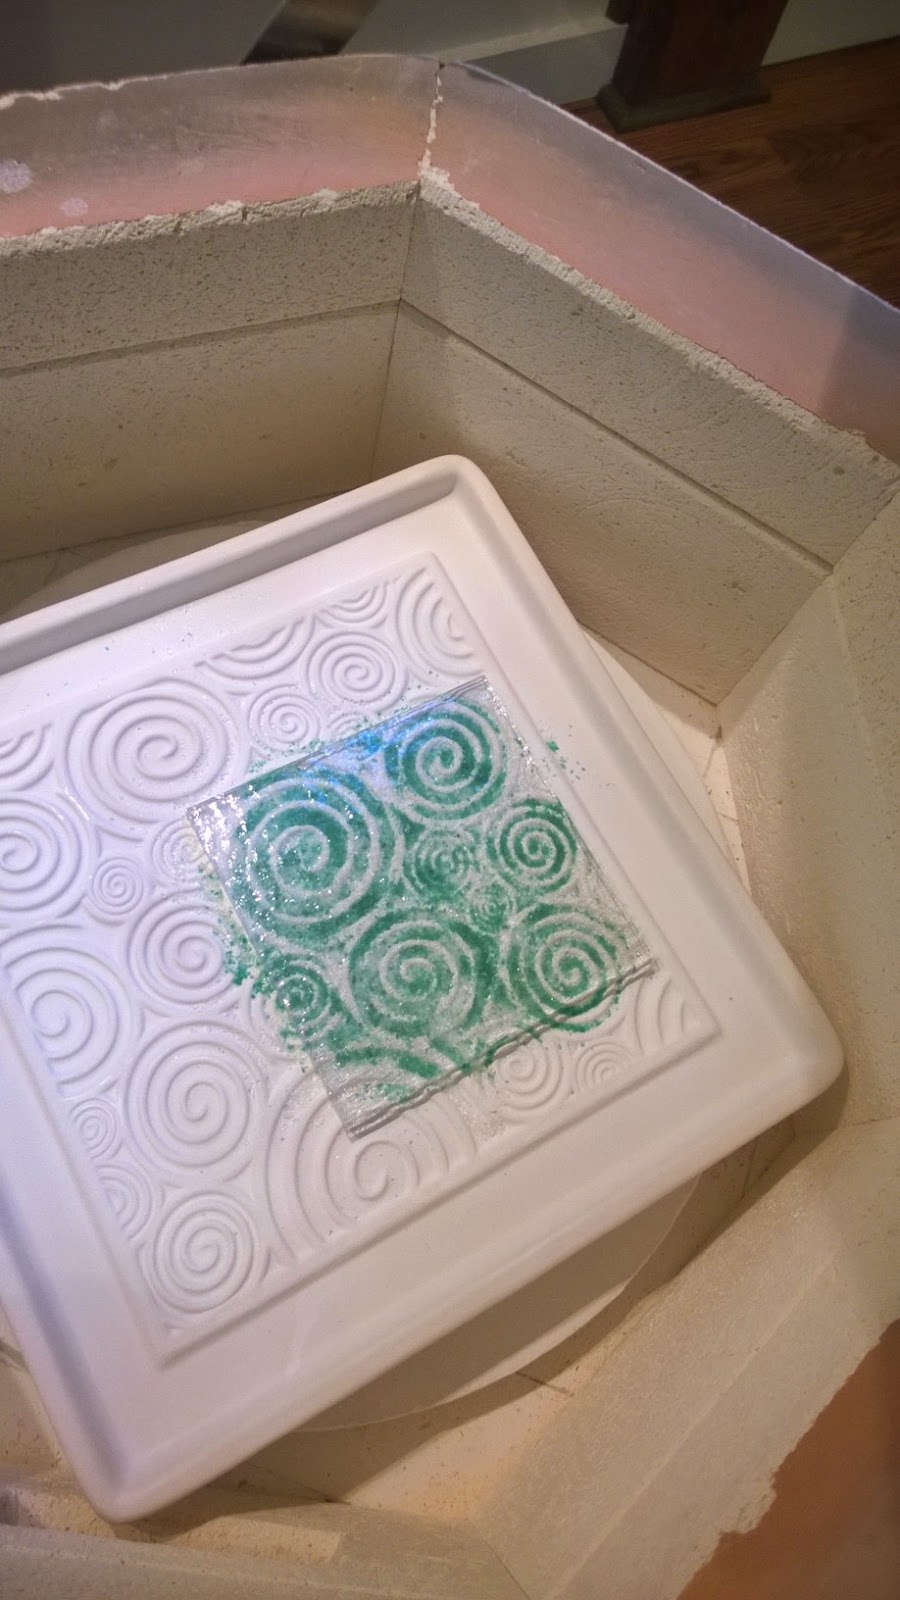
Once getting this clean I noticed a few spots that would not come off.  Probably some sort of devitrification, so the next firing will be an experiment.  I am using two piece of 3mm clear glass and I placed it on the spiral pattern fusing mold.  Deep spirals many different sizes, very pretty pattern.  I cleaned the glass carefully and I am also going to change the firing schedule.  I am lowering the processing temperature to 1355 degrees and holding that for 3 minutes.  Going to clean off my work table and make an extra effort to keep that area clean, putting paper down first and then the grate on which I cut the glass next.  I think that my kiln fires hot so perhaps this will help.  Also I put the mold on a 2 inch stand or kiln furniture even though they suggested 1 inch.  This will bring it closer to the heat but those pieces or stand were already in there and I left them in.  so this experiment will not be as valid as I could get.  My laziness is a problem.  But lets just see.


So as you can see it came out pretty well except for lots if what appears to be bubbles or flecks of glass, but it does not look bad it kind of looks good.  I do not know exactly what this means because I read yesterday that devit is often in dark opaque glass and in this experiment I used clear.  I guess the best experiment will be on dark opaque with the temperature I used in this firing.  I slumped it and it came out ok.

 The next experiment will be with a dark opaque glass with clear on the bottom and using the firing schedule that I used for the above.  In between this I tried to fire polish a screen melt and it did not quite work.  That was the second time I tried a fire polish schedule for that piece and the first time the kiln did not complete the full schedule and it stopped with error message PF2.  But my next project will be another attempt at the botanical pattern melt and if that works then I will assume that there may be some problem with the glass.

Well, it came out a little better but it still had parts which look like as Mark describes them "dusty".  I had fewer of these spots than the previous ones.  Perhaps I can only use clear or transparent glass on these deeper molds.  For the next experiment after I slump this blue piece will be too use a smaller less deep mold.


Cherry Blossom Texture MoldSo the next one will use this mold with the following firing schedule:

300 dph.............................1360 degrees........................hold 20 mins
300 dph..............................1465 degrees.......................hold 10 mins
Full.......................................900 degrees......................hold 1 hour
100 dph.................................700 degrees.....................off

Again, because I am not covering the whole mold, only using a portion of it I will lower the processing temperature to 1455 degrees and hold for 5 mins.  Again, since this mold is not as deep or heavy and It is not held for such a long time or goes up to its processing temperature as quickly, I will try it with an opaque glass but see if I can find a light colored opaque on the bottom of which I will put clear.

Sunday, June 22, 2014

Continue to work on Texture Molds

Concave versus convex.  The mold that I used had a convex decoration on it, the cherry blossom mold.  So this means that the cherry blossom decoration was on top of the mold standing out and that the glass fused down around it, instead of into it.  In the experimental piece the glass fused fine put the sides pulled around the edges where the design came to the edges.  I wonder if there is anything to do about that?

Maybe I will post this question to Bullseye later but for now I will use the molds that are concave, that you melt into and try to make sure I have enuf glass.

This is my new spiral pattern fuser from Colour de Verre.  I sprayed it with MR-97 and put two sheets of 3mm glass on top of it and fired it to the following schedule.  The schedule is listed on the Colour de Verre web site and this is for a Top Element kiln.  The posted schedule is for glass with a COE of 96.  My glass has a COE of 90 so I haved increased casting temperature, which I am assuming are all the temperatures by about 20 degrees.  :

100 dph,,,,,,,,,,,,..........................................320 degrees.............hold  30 mins.
150 dph..................................................1250 degrees...........hold  30 mins
150 dph..................................................1390 degrees...........hold 5 mins
Full..........................................................900 degrees............hold 60 mins
100 dph...................................................600 degrees............Off no venting

I am concerned that I am holding too long at 1250 degrees and going up so slowly to 1390, but the instructions say never to go fast with the mold because rushing it will cause thermal shock.  So I am not going to do that.

The results.  Some of the things that I learned is one, the glass fuses together so fully and so well at such a low temperature is because the firing schedule moves up so slowly.  Additionally I used one square of blue transparent and one square of clear.  I placed the clear square down on mold and blue transparent on top of it.  This means that The pattern is in the clear part and the more vivid color in this case is the bottom of the piece.  I could have made it the top of the piece if I slumped it the other way.  Things to think about. The glass is out of the kiln.  A few first thoughts.  Edges are still pulling a bit.  Perhaps next I will use slightly thicker glass.

Next time I am using 2 squares of clear glass and I filled the mold partly with a layer of clear frit topped with a layer of green frit.  It was not easy to fill those concave parts of the mold with frit.  This one will take more practice.


I am using this firing schedule with experiment two.  The only real difference from myinstructions is that I am using the processing temperature or what I am considering the casting temperature of 1370, the lowest for glass which is COE 90.  Tomorrow the results.

I slumped this with design side on the bottom.  I prefer the design on the top, I also prefer the vivid color if I am using clear base on the top.  Using the lowest casting temperature worked well.

My next project is on the botanical pattern fuser from Colour de Verre.  I have filled a square patch of the patterns on the fuser with fine colored frit and over it I placed two pieces of 3mm white glass.  I am running the following schedule  which is the schedule I used on the others using the lowest possible processing temperature for COE 90 glass:

100dph...................300 degrees.......................hold 30 mins
150dph...................1250 degrees.....................hold 30 mins
150dph...................1370 degrees.....................hold 5 mins
Full..........................900 degrees......................hold 1 hour
100dph....................700 degrees.......................Off

Botanical Pattern Fuser

Botanical Pattern FuserThis is the fuser, it has deeper crevices for the design and thus I found it easier to fill with frit.  With this project I will look at how the design comes out.  Is it evident where I made mistakes with the frit or was not so careful?  Does it matter?  I used two pieces of white glass.  I did not use glass base.  Does the glass base remove some of the vividness of the color when it is fused together with a color in this process or is it simply because I used transparent glass.     
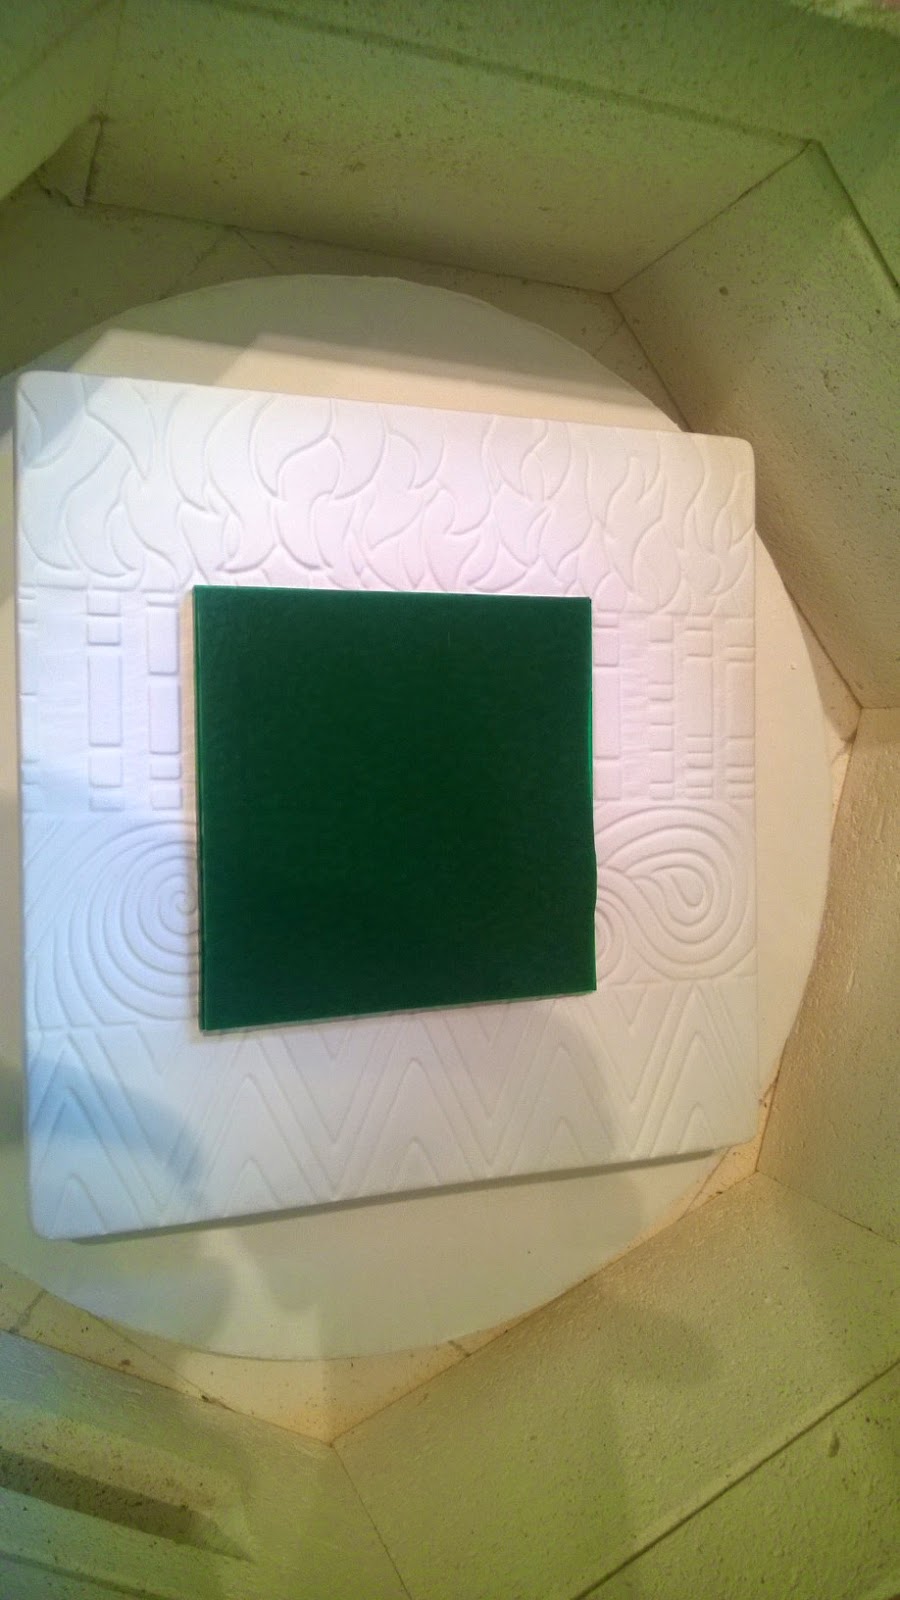
I have learned something, that is, when I go back to using the other molds from a different company I will do things differently.  First those molds are not as heavy or substantial as the Colour de Verre or the designs are not as  deep, so in choosing a firing schedule I will fire their suggested schedule with an eye for going as slow as possible.  This will insure that the two pieces of glass fuse together which is what I want.  I also can accomplish their fusing together by prefusing them before using the mold.  And maybe I should try to buy some irid glass along with more Boron 97
I also learned that I do not like it as much when I fill the crevices on the texture mold with frit.  I like it more when the textures are put directly into the glass.  At the store I bought some Iridized glass, some champagne tint and some slate grey, all colors I will use in this current project.  I want to test some color combinations next then clean all the molds, clean the shelf, and get everything ready to go.  Ralph at the store says I can make some larger and I will give that a try.

Sunday, June 8, 2014

Continue on Texture molds and 4 and 5/8th slumping mold.

 
This morning I am full fusing a few trinkets using the following schedule:

400dph............................1225.................20 mins
600dph.............................1470................10 mins
Full .................................900....................1 hour
150..................................700.....................0
Off


Just a few items while I decide how to proceed.  These are beads or potential pins.  I have a pin back in my pocketbook.  Meanwhile I am going to cut glass for tomorrows project using the texture mold.  What is the best glass to use with a texture mold?  should it be opaque or transparent.  I have already used an opaque and that turned out ok although I was not crazy about it, so this time I will use transparent with a clear base.  Also the next time I can use transparent with a black base.  I will cut this to 4 and 5/8ths square so that I can slump it on my mold.  And I should continue preparing for my tiles.  Tiles will be four inches square.

Thisis one of my new texture molds and I am going to reproduce that with a transparent green glass with clear base.  I am going to do this with 5 mm of glass rather than 6mm which is what I used in the first try that came out quite well and the people in the store want that one, so this time I will hold it a little longer at the first and segments of the firing schedule and lower the firing processing temperature as follows:

300dph..............................................1360 degrees...................... hold 20 min
500dph...............................................1460 degrees......................hold 10 mins
Full.......................................................900 degrees......................hold 1 hour
100 dph.................................................700 degrees.....................hold 1 min


This pretty textured mold is called the Cherry Blossom Texture mold.  I will fire this at the above schedule.
Well I cannot get the picture to work but basically what happened was the sides pulled in as if it was too hot and not enuf glass so I will go back to initial texture mold and use two 3mm pieces of glass, same firing schedule and hope for the best.

Now it is working.  This is what came out pulling swollen side.  Lets try to make it better.
So I did another with other texture mold but this time I used two pieces of 3mm glass, blue transparent and white opaque and I used the firing schedule on Delphis instructions.  It came out pretty well but their appears to be a little white stuff on one corner  I am soaking it now in white vinegar and will try scrapping it off after a day of soaking, but it could be dvitrification.  In that case I will do another piece but ramp up quicker in segment two like I did originally and try that.  I will also use transparent glass with clear transparent instead of opaque.  Two different colors do not look so good so perhaps I should two of the dame color instead.   I will have to clean the mold and respray it.  Lets hope it works better.

I have learned so much this time around.  I tried the first texture mold with the 4 segments with 2 pieces of 3mm glass and it came out with rounded sides but what appeared to be devitrification on the top.  Not completely sure it was devit but I tried to soak it in vinegar and then scratch it off.  That did not remove off, so I tried covering it with a layer of white powder and firing it to 1425 degrees with a 10 min hold.  Thought that it might remove the design of the texture mold which I had in the glass and it did.  So what causes devit, a couple of things...going to slowly while ramping up to the processing temperature and also residue.  In this case I think I had both, not sure which one caused it so in the next firing I will try to correct for both.  And now I also see the using the Boron Nitrate spray on these molds, while easier, does not work as well.  So I purchased some more molds and when I get them I will cover them with Bullseye glass separator.  In this last firing I put my glass directly on the shelf, however there was a part, a small part of the shelf, that was not covered with glass separator and when I pulled up my piece of glass a piece of the shelf, albeit very small piece, came with it.  Idiot, I should of known this.  So now before I do any piece that I want to put directly on the shelf I have to scrape off the old glass separator and apply new.  I am planning to use molds for the next few firings so they are elevated off the shelf and the glass is put on them. 

My next firing will be on the 4 segment texture mold that I have sprayed with Boron Nitrate.  Once having covered a mold with Boron Nitrate spray one cannot start covering the mold with a different glass separator.  I looked at the mold and noticed what looks like patches that are heavier or thicker than other patches, perhaps there is some extra residue there.  Before putting glass on it I am going to try wiping it with a dry cloth and vacuuming the inside of the kiln to make sure there is no remaining residue, hopefully.   And for the firing schedule, I will use the following:

300 dph..............................................1360 degrees..........................hold 10 min
500 dph..............................................1465 degrees..........................hold 10 min
Full......................................................900 degrees...........................hold 60 min
100 dph................................................700 degrees.......................... hold 1 min

 
Experiment 1:  I have brushed off the old Boron Nitride spray and re-sprayed the mold.  On top I placed a small rectangle of clear glass covered with the same size rectangle of a darker clear glass, both 3 mm thick.  I don't remember what the stated color is.  I am going to fire it with the firing schedule stated by Delphi.  Now that I have the correct thickness hopefully it should work.  The uneven edges of the previous work fused on this mold was probably due to not enuf glass.  When I sprayed the mold this one time I held the spray for a few, perhaps several minutes over the allotted 6 minutes in order to make sure that it would work.  This time if there is devit or uneven sides I will know that it is not due to not enuf glass. 
The last one I did stuck to the mold, I think it was because I did not spray it long enuf and I wiped it with a cloth before firing on it.  Hopefully this one will release.  In order to get the glass to release from the mold, I ramped the kiln up slowly, 150 degrees until it reached 650 degrees and then let it cool naturally.  That did not work but I was able to pry the piece from the mold instead.  Of course in doing that the glass took a small chunk of the mold with it.  But I think I can continue to use that mold, not making a piece that covers the whole mold but a smaller one that covers only a partial segment of the mold, the part that is not missing a chunk.  Any way I will use the following firing schedule on my experimental piece:  300 dph.......................1360 degrees........................................hold 10 mins.  300 dph.....................................1465 degrees.........................................hold 5 mins
Full...................................900 degrees........................hold 1 hour
100 dph.........................................700degrees..........................hold 2 mins

Thursday, June 5, 2014

New Mold 4 and 5/8 inches square.

I've got a new mold, a subtle slump, 4 and 5/8 inches square.  I think I will use this size (small) and the shape of the mold to practice more with design and color.  This way I will not be making big pieces and potentially wasting the glass, if it come out not the way I like.  This initial fuse with the dot design came out well>  Corners were rounded on this 2 layer piece of one 3mm blue opaque and one 2mm clear piece.  This combination of pieces equalling 5mm not the typically 6mm feels right, not too thick or heavy.  Also I had cut the rod into uneven pieces, not on purpose, but because it is hard to amke them all the same but they all fused flat and well but some appear to have a samll bit of devit on their tops, maybe a leftover bit of the glue that used to stick them to the surface before putting into the kiln.  Should i try to fix it with the fix of putting a layer of clear glass powder over the top and refiring it or should I go ahead with the slump?  I will think about it.  Anyway to fuse it I used the following schedule:

300dph..........................................1225 degrees......................................30 min
600dph..........................................1470 degrees.......................................10 min
Full..................................................900 degrees.........................................1 hour
100 dph...........................................700 degrees.........................................2 min
Full....................................................70 degrees.........................................Off

Anyway, I decided to put a layer of clear powder over the top surface and fire it to 1425 degrees and hold for 10 mins.  I ramped up 600 dph for the first and second step and then held at 1425 degrees and then full power to 700 and then off.  I hope this annealing does not break it.  I should go slower.

It did not break thank goodness and it also came out beautyfully, the devitrication on the dots was gone.  I love Bullseye, anyway, now I am slumping it with the following schedule:

300dph...................................1200 degrees....................hold 20 mins
Full............................................900 degrees...................hold 1 hour
100 dph......................................700 degrees...................hold 1 min
Full...............................................70 degrees...................Off