I continue to have a devit problem. With the deeper pattern molds I have lowered the processing temperature and brought the hold tie way down low. I can lower it even more and will try this when next I use the deep pattern mold. But to begin today I am slumping an already completed piece. I will use the following firing schedule:
200dph.............................1220 degrees.....................5 min
Full.....................................900 degrees.....................1 hour
100 dph...............................700 degrees....................Off
Once i finish slumping I am thinking of using the cherry blossom fuser again, with one layer of clear and then one layer of clear and red glass on top. I changed my mind about using the red and clear glass. Did another design of white mixed with a clear glass with red and brown and white stringers on it and I put clear glass as a base. Thinking of full fusing the whole thing first and them putting it on the mold . So I am full fusing layer of clear glass and another layer of several pieces(2pieces of white and one piece of clear with stringer glass) on the bottom. I am placing it on the bottom to see if I can get a more fully fused piece with better lines. Then after fusing I will put it on the cherry blossom mold and fuse that.
So I will be looking to see how the design and the mixture of the glass works when I put it on the bottom and full fuse it first. Often when fusing a solid piece as the base and mixed pieces on top those pieces to not fit together very well and appear to have spaces. Perhaps putting the mixed pieces on the bottom whilst fusing them will allow them to fit together better. Tomorrow I will spray the cherry blossom pattern fuser and place the new double pieces fused today on top of it. Lets hope it all works.
Carefully observed decisions and firing instructions for creating with glass. Thoughts on color, placement and reactions achieved through the glass work.
Showing posts with label Concave versus convex. Show all posts
Friday, July 18, 2014
Sunday, June 22, 2014
Continue to work on Texture Molds
Concave versus convex. The mold that I used had a convex decoration on it, the cherry blossom mold. So this means that the cherry blossom decoration was on top of the mold standing out and that the glass fused down around it, instead of into it. In the experimental piece the glass fused fine put the sides pulled around the edges where the design came to the edges. I wonder if there is anything to do about that?
Maybe I will post this question to Bullseye later but for now I will use the molds that are concave, that you melt into and try to make sure I have enuf glass.
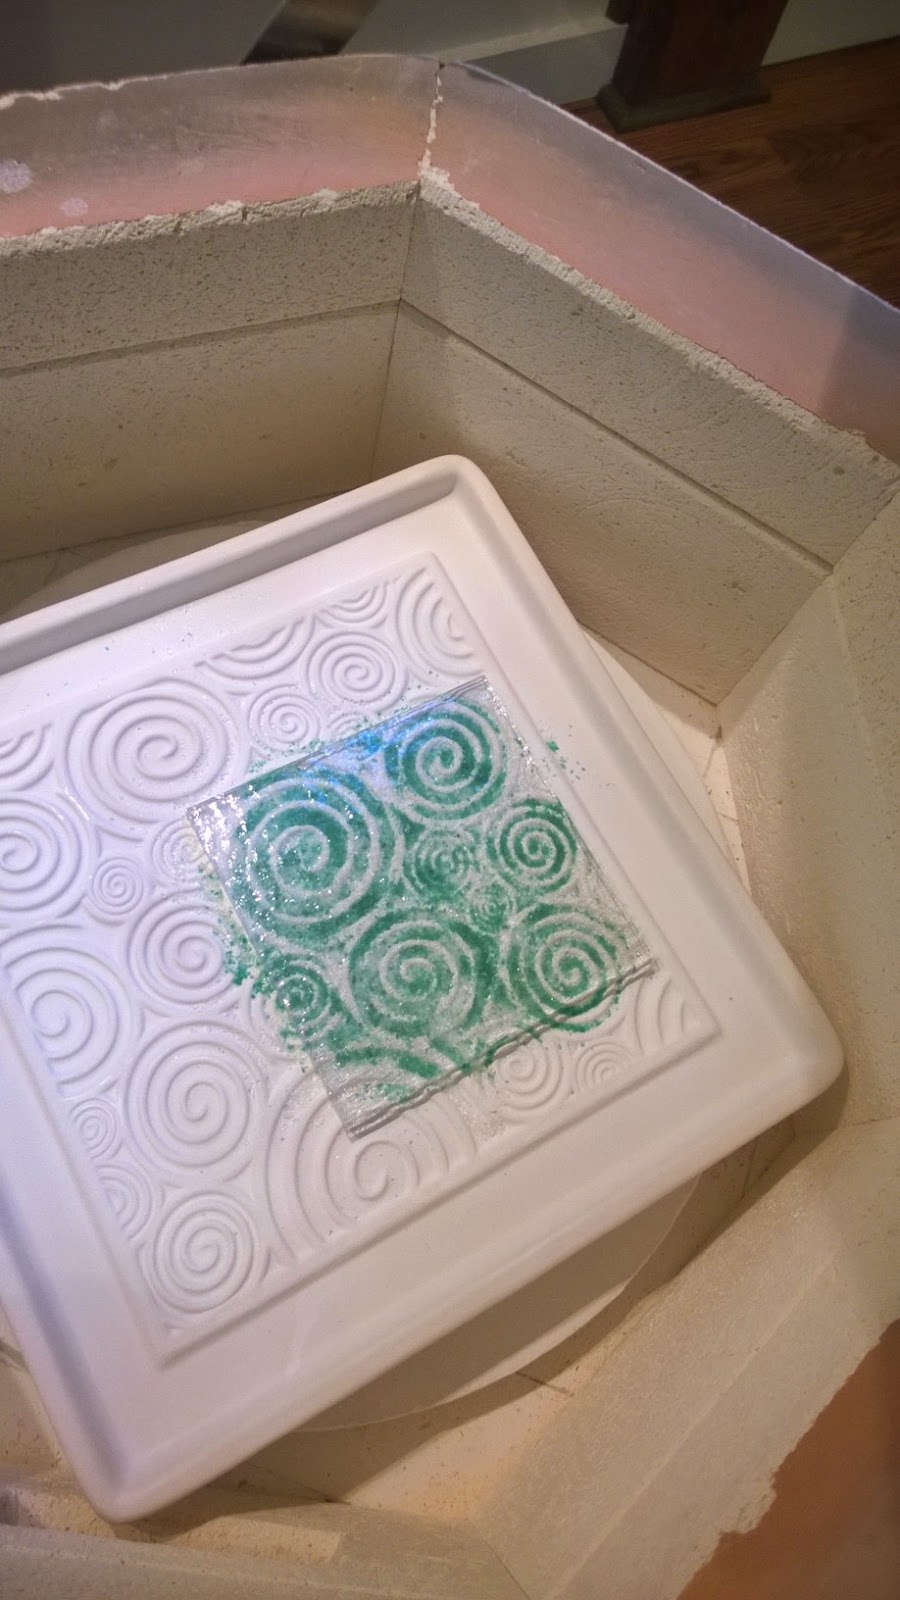
This is my new spiral pattern fuser from Colour de Verre. I sprayed it with MR-97 and put two sheets of 3mm glass on top of it and fired it to the following schedule. The schedule is listed on the Colour de Verre web site and this is for a Top Element kiln. The posted schedule is for glass with a COE of 96. My glass has a COE of 90 so I haved increased casting temperature, which I am assuming are all the temperatures by about 20 degrees. :
100 dph,,,,,,,,,,,,..........................................320 degrees.............hold 30 mins.
150 dph..................................................1250 degrees...........hold 30 mins
150 dph..................................................1390 degrees...........hold 5 mins
Full..........................................................900 degrees............hold 60 mins
100 dph...................................................600 degrees............Off no venting
I am concerned that I am holding too long at 1250 degrees and going up so slowly to 1390, but the instructions say never to go fast with the mold because rushing it will cause thermal shock. So I am not going to do that.
The results. Some of the things that I learned is one, the glass fuses together so fully and so well at such a low temperature is because the firing schedule moves up so slowly. Additionally I used one square of blue transparent and one square of clear. I placed the clear square down on mold and blue transparent on top of it. This means that The pattern is in the clear part and the more vivid color in this case is the bottom of the piece. I could have made it the top of the piece if I slumped it the other way. Things to think about. The glass is out of the kiln. A few first thoughts. Edges are still pulling a bit. Perhaps next I will use slightly thicker glass.
Next time I am using 2 squares of clear glass and I filled the mold partly with a layer of clear frit topped with a layer of green frit. It was not easy to fill those concave parts of the mold with frit. This one will take more practice.
I am using this firing schedule with experiment two. The only real difference from myinstructions is that I am using the processing temperature or what I am considering the casting temperature of 1370, the lowest for glass which is COE 90. Tomorrow the results.
I slumped this with design side on the bottom. I prefer the design on the top, I also prefer the vivid color if I am using clear base on the top. Using the lowest casting temperature worked well.
My next project is on the botanical pattern fuser from Colour de Verre. I have filled a square patch of the patterns on the fuser with fine colored frit and over it I placed two pieces of 3mm white glass. I am running the following schedule which is the schedule I used on the others using the lowest possible processing temperature for COE 90 glass:
100dph...................300 degrees.......................hold 30 mins
150dph...................1250 degrees.....................hold 30 mins
150dph...................1370 degrees.....................hold 5 mins
Full..........................900 degrees......................hold 1 hour
100dph....................700 degrees.......................Off
This is the fuser, it has deeper crevices for the design and thus I found it easier to fill with frit. With this project I will look at how the design comes out. Is it evident where I made mistakes with the frit or was not so careful? Does it matter? I used two pieces of white glass. I did not use glass base. Does the glass base remove some of the vividness of the color when it is fused together with a color in this process or is it simply because I used transparent glass.
I have learned something, that is, when I go back to using the other molds from a different company I will do things differently. First those molds are not as heavy or substantial as the Colour de Verre or the designs are not as deep, so in choosing a firing schedule I will fire their suggested schedule with an eye for going as slow as possible. This will insure that the two pieces of glass fuse together which is what I want. I also can accomplish their fusing together by prefusing them before using the mold. And maybe I should try to buy some irid glass along with more Boron 97
I also learned that I do not like it as much when I fill the crevices on the texture mold with frit. I like it more when the textures are put directly into the glass. At the store I bought some Iridized glass, some champagne tint and some slate grey, all colors I will use in this current project. I want to test some color combinations next then clean all the molds, clean the shelf, and get everything ready to go. Ralph at the store says I can make some larger and I will give that a try.
Maybe I will post this question to Bullseye later but for now I will use the molds that are concave, that you melt into and try to make sure I have enuf glass.
This is my new spiral pattern fuser from Colour de Verre. I sprayed it with MR-97 and put two sheets of 3mm glass on top of it and fired it to the following schedule. The schedule is listed on the Colour de Verre web site and this is for a Top Element kiln. The posted schedule is for glass with a COE of 96. My glass has a COE of 90 so I haved increased casting temperature, which I am assuming are all the temperatures by about 20 degrees. :
100 dph,,,,,,,,,,,,..........................................320 degrees.............hold 30 mins.
150 dph..................................................1250 degrees...........hold 30 mins
150 dph..................................................1390 degrees...........hold 5 mins
Full..........................................................900 degrees............hold 60 mins
100 dph...................................................600 degrees............Off no venting
I am concerned that I am holding too long at 1250 degrees and going up so slowly to 1390, but the instructions say never to go fast with the mold because rushing it will cause thermal shock. So I am not going to do that.
The results. Some of the things that I learned is one, the glass fuses together so fully and so well at such a low temperature is because the firing schedule moves up so slowly. Additionally I used one square of blue transparent and one square of clear. I placed the clear square down on mold and blue transparent on top of it. This means that The pattern is in the clear part and the more vivid color in this case is the bottom of the piece. I could have made it the top of the piece if I slumped it the other way. Things to think about. The glass is out of the kiln. A few first thoughts. Edges are still pulling a bit. Perhaps next I will use slightly thicker glass.
Next time I am using 2 squares of clear glass and I filled the mold partly with a layer of clear frit topped with a layer of green frit. It was not easy to fill those concave parts of the mold with frit. This one will take more practice.
I am using this firing schedule with experiment two. The only real difference from myinstructions is that I am using the processing temperature or what I am considering the casting temperature of 1370, the lowest for glass which is COE 90. Tomorrow the results.
I slumped this with design side on the bottom. I prefer the design on the top, I also prefer the vivid color if I am using clear base on the top. Using the lowest casting temperature worked well.
My next project is on the botanical pattern fuser from Colour de Verre. I have filled a square patch of the patterns on the fuser with fine colored frit and over it I placed two pieces of 3mm white glass. I am running the following schedule which is the schedule I used on the others using the lowest possible processing temperature for COE 90 glass:
100dph...................300 degrees.......................hold 30 mins
150dph...................1250 degrees.....................hold 30 mins
150dph...................1370 degrees.....................hold 5 mins
Full..........................900 degrees......................hold 1 hour
100dph....................700 degrees.......................Off
Botanical Pattern Fuser
I have learned something, that is, when I go back to using the other molds from a different company I will do things differently. First those molds are not as heavy or substantial as the Colour de Verre or the designs are not as deep, so in choosing a firing schedule I will fire their suggested schedule with an eye for going as slow as possible. This will insure that the two pieces of glass fuse together which is what I want. I also can accomplish their fusing together by prefusing them before using the mold. And maybe I should try to buy some irid glass along with more Boron 97
I also learned that I do not like it as much when I fill the crevices on the texture mold with frit. I like it more when the textures are put directly into the glass. At the store I bought some Iridized glass, some champagne tint and some slate grey, all colors I will use in this current project. I want to test some color combinations next then clean all the molds, clean the shelf, and get everything ready to go. Ralph at the store says I can make some larger and I will give that a try.
Subscribe to:
Posts (Atom)