Showing posts with label pot melts. Show all posts

Wednesday, February 18, 2015

PYRAMIDS AND POT MELTS and all else continued


The dichroic pieces that I put along the sides of the pyramid did not work.  You cannot see them clearly and they may have damaged the sides of the mold.  I have not yet tried to clean the mold.
And the white frit, that I had made, that I added to the bottom just makes everything look cloudy.  I wont do that again.  So now I placed it in the kiln and I am trying to firepolish it using the following fire polishing schedule:

200dph...................................1300 degrees....................................hold 10 mins
Full.............................................900 degrees..................................hold 2 hours
off

After fire polishing my next project will be to cut the billet that I bought, not an easy task, and to use that in the pyramid.  In addition to that I want to full fuse a couple of pieces of glass that I have and like.

So after the pyramid is fire polished I will try using this billet that I was able to cut.

So back to the pyramid---I made so many mistakes in this one, first adding those dichroic pieces on the periphery of the piece seem to have been a huge mistake, secondly adding my white hand made frit to the bottom, to save using the expensive purchased casting frit looks like some big white blob in the middle.  And the whole thing looks terrible.
I fire polished the piece but that does not seem to have helped at all, making the piece look like it has some sort of leather on the surface of it.  and finally it may have ruined my mold.  I have yet to try to clean off the black mark from the sides. 

So now I will try to full fuse a remnant from a pot melt and a piece of black glass while I am cleaning off my mold and planning for the next pyramid attempt.
Isn't that pretty, although I could not clean off what I suspect was kiln wash from the bottom of the green pot melt piece I am going to fire it anyway.  I rubbed the back of the pot melt with a diamond pad, and with piece of sand paper and the white stuff would not come off the surface.  I think it could use sandblasting and I don't have a sand blasted or know what to do instead.  So I will fire this piece anyway using the following schedule:

400dph....................1225 degrees.......................hold 1 hour
600dph....................1470 degrees.......................hold 10 mins
Full..........................900 degrees.........................hold 1 hour
100dph.....................700 degrees........................hold 1 min
off
I tried more rubbing of the piece after it came out of the kiln, with sand paper to see if that would remove the white stuff but it would not so i put it back into the kiln to slump which is what I had originally planned to do with it, using the following firing schedule:
200dph............................1200 degrees.....................Hold 25 mins
Full....................................900 degrees.....................hold 1 hour
100dph...............................700 degrees.....................-0-
off
As it fired I started thinking about the green piece, the results of the screen or pot melt, that I used my saw to cut, that i successfully connected by fusing to the black piece.  Would that green piece slump or will this firing be the breaking point for that piece, the point where it has gone into the kiln too many times and it breaks.  The first and last time that I tried to slump some glass from a screen or pot melt it broke during the firing.  So I will see now what happens specifically to the part of the above piece that is the result of a melt.

Along with that I have prepared two experimental pieces one that I will put the copper mesh that Ruth gave me on black glass and the other on which I will place copper mesh on white glass.   I will cap both piece with clear glass and try it with a full fuse.   And before I can fire the billet in the pyramid mold I will have to try firing the mold inverted in a kiln up to 500degrees and hold for 20 mins, during which time any glass that is embedded in the side should melt and come out.  Lets hope so.  Once that is done I have to clean the mold by brushing off old mr 97 and respray it to go a new time. 


The two pieces fused together, the problem is that I matched one side of the pot melt piece with the black but I did not make sure that its opposite side was perfectly straight, thinking that it might be taken care of during fusing and not wanting to have to try to cut the piece and risk it breaking apart.  So it looks a little mishapen, as you can see looking at the picture in the lower left hand corner.

Pot Melts

I am going to attempt another pot melt this time using shades of green with yellow and some clear glass.
What I am testing this time is whether or not I can protect my shelf during a pot melt with 1/8th inch fiber paper.  The shelf is in pretty bad shape.  Both of my shelves are and so it behooves me not to make it any worse than it currently is.  This is what I am laying down to cover the shelf during the pot melt.
Hopefully this will work well.  All that I have read so far says that you either melt stuff directly onto a shelf, or into a slight container, or into some sort of former or on fiber paper.  I have taken the fiber paper route.
I have decided to use shades of green and yellow along with a little bit of clear, that along with what is already in the pot itself should look good.  I will be using the following firing schedule for approximate 10 ounces of glass.
250 dph...................................................1100 degrees........................hold 15 mins
450 dph....................................................1685 degrees.......................hold 1 hour
Full...........................................................1520 degrees.......................hold 15 mins
Full...............................................................900 degrees.....................hold 3 hours
100 dph.......................................................800 degrees.........................hold 1 hour
100 dph........................................................650 degrees......................hold 15 mins
off

This is what I used, shades of green some opaque and some transparent, along with yellow and clear. 

Not so great it developed some sort of brown in it, although I did not put any brown in it and the yellow seemed to overtake everything else.  Regarding the use of fiber paper underneath.  It did take on a rough surface, but one that was slightly attractive.  Even though that side is attractive, I am placing it on the clear glass because this top part had a point that I wanted to get off with fusing.    Here I have place it on a circular disk of clear glass.  It was supposed to be a half inch larger than what came out of the pot melt, but I use a circle cutter instead of doing it freehand so I set it to a specific number diameter and went with it.  That meant that some of the portions of clear glass surrounding the circle of pot melt were larger than others and so the idea or a rim was not achieved in my point of view.  I also noticed some rough parts of the finished pot melt where perhaps the glass was not reacting terribly well to the heating in the kiln.  But who knows, I don't.  Not sure what I am going to do with this one.  I am afraid if I put it back in the kiln that the glass will be destroyed or as I have previously said, look volcanic.  I'll think about it.
And when I fused the pot melt to the clear piece of glass I used the following firing Schedule:

400 dph............................1225 degrees...................................................hold 1 hour
600 dph............................ 1450 degrees..................................................hold 10 mins
Full......................................900 degrees..................................................hold 1 hour
100 dph...............................700 degrees...................................................hold 1 min
off

Was that high enough, I don't think so because I wanted the piece of pot melt to become one with the clear glass and it did not.  It clearly remained two separate pieces.  Also what happened to the glass.


next, using firing schedule above except going to 1600 as processing temperature and holding for 3 1/2 hours at 900 degrees instead of 3 hours.  I peeked in and the glass did not fill the entire oval that I had created. I used 6.80 ounces of glass for a soap dish mold that is approximately 6 by 4 inches.  Should have used a bit more.  Have not taken it out yet because it is still hot.  But it looked pretty.  I should have spread the dark blue or royal blue around more but still it came out pretty.  Once it cools I will see if I can slump it over my soap dish mold

Next one I used 10.10 ounces of glass and got an almost perfect 5 and 1/2 circle.
I used the following firing schedule:

250 dph................................1100 degrees.......................hold 15 mins
450 dph.................................1625 degrees......................hold 1 hour
Full ........................................1520 degrees.....................hold 15 min
Full..........................................900 degrees......................hold 3 1/2 hour
100 dph....................................800 degrees......................hold 1 hour
100 dph.....................................650 degrees.....................hold 15 min

Now that came out okay, so I am putting a yellow amber transparent rim around the bowl .  and using the Full Fuse schedule as follows with some changes

200 dph..............................1000 degrees..................................hold 30 min
250 dph...............................1225 degrees.................................hold 60 min
Full......................................1475 degrees.................................hold 20 min
Full........................................900 degrees.................................hold 1 hour
100 dph..................................800 degrees....................................-0-
100 dph...................................725 degrees...................................-0-

off

However it was suggested to ramp up in the first segment 100 degrees at a time.  I am not doing that and ramping up 200 degrees in the first segment instead of 100 degree ramp.

Sunday, February 1, 2015

CASTING PYRAMID MOLD CONTINUED.......doing a pot melt while waiting for the right glass for my casting

Casting pyramid mold continued:
I decided to buy glass from Bullseye that is specifically made for clarity in casting.  In the cast of the pyramid mold that is Bullseye glass (frit) in the 1800 and 1900 series.  While I am waiting to receive that casting tint frit I am going to do a pot melt and then work on my tile saw as well as consider using my murrini mold. 

The first issue to consider for pot melts is how much glass to use and I am following this formula:
"To determine the amount of glass needed for a rectangular space, ..., measure the height, length, and width in centimeters of the space to be filled.  Multiply those numbers together and multiply the answer by 2.5.   This is the weight  in grams of the glass needed.  Using my 5 inch square former, if I would like a 2 layer glass piece which in 1/4 inch thick I would use 9.65 ounces of glass.  So right now in the kiln, I have approximately 16 ounces of glass, transparent amber, transparent green and yellow, along with white.  I am thinking of taking out all the white before firing tomorrow morning and seeing the weight after that.
I am also thinking about putting a clear square on the bottom or maybe I will just use some pieces of clear, enough to cover the bottom of the piece.  We shall see.

I took out the white, making it lighter, and place a clear square underneath the former.  For this pot melt, I will use the following firing schedule:

250 dph............................1000 degrees..................hold 15 mins
450 dph.............................1600 degrees.................hold 1 hour
Full....................................1450 degrees.................hold 15 mins
Full......................................900 degrees.................hold 2 hours
100 degrees..........................800 degrees................hold 15 mins
100 degrees..........................650 degrees................hold 15 mins
off

This is the resulting pot melt.


Certain parts of this look like the glass crackled from holding it too long .  Wait I am going to check on Glass tips, I think he just discussed this.  Next time I try holding at a lower temperature for longer i.e.
450 dph...............................1250 degrees...........................hold 1 hour
600dph.................................1500.......................................hold 2 houres


Monday, September 22, 2014

CONTINUATION OF POT MELTS

Not sure of what I put in before or what happened but here is the result of my latest pot melt
Because of the uneven edges, which I have ground as well as I can, and because of some spikes on the surface of the melt, I am putting it through for another firing.  Used Delphi Firing Screen Melt 2nd Firing as follows:

225 dph.................................1050 degrees...................hold 20 ins
800 dph.................................1465 degrees...................hold 30 mins
full...........................................900 degrees...................hold 1 hour
150 dph............................,.......700 degrees...................hold 1 min
off

And it worked, the pits and spikes in the melt, along with the rough edges, however for the uneven sides I placed some mixed clear frit, pieces both large and small, on the edges and they fused into an even more uneven edge.  The clear base that that I placed there fused well but there may be some scum on the surface.  Not exactly sure what to do.  Should I try to save it, grind the clear uneven edges, soak it in vinegar to see if I can remove some of the scum.  If that does not remove it place it in for another firing to remove devit, or just put it in a box to be cut up at some later point and try again from the beginning.  Somehow I want to take this through to completion.  That seems like good practice and maybe I will learn something, so I will follow the above steps and then slump it.

To clear off the devit I covered the circle with a layer of clear powder and have put it back in kiln to fuse to 1410 with a hold of 20 mins.  once it comes out, it is pretty thick.  I can slump it and will try.


 This is the next pot melt, using blue and green transparent, along with what looks like amber transparent.  Am going to melt it into a square former which I have lined with fiber paper.

So this came out looking like this:

For the pot melt I used the following firing schedule
250 dph.....................................1100 degrees..........................hold 15 mins
450 dph......................................1680 degrees.........................hold 1 hour
Full.............................................1520 degrees.........................hold 15 mins
Full ............................................  900 degrees..........................hold 3 hours 
100dph..........................................800 degrees..........................hold 1 hour
100 dph.........................................650 degrees..........................hold 15 mins
off 
I simply changed it by not holding it 3 hours at 900 degrees and held it 2 hours instead.  This above piece could have benfited from more clear.  It is a little muddy and it had a spike and one corner of the glass looked like it had cracked some time earlier in the process.  So with all those potential areas that will not improve I am placing that in the kiln again and re firing it a 2nd time with the hope that the spike will smooth out, the sides repair themselves and the piece get a little thinner.   I am using the following firing schedule:

225 dph......................1100 degrees..........................hold 20 mins
800 dph.......................1465 degrees.........................hold 30 mins
Full ..............................900 degrees..........................hold 1 hour
300 dph........................ 350 degrees..........................Off

So here is what happened.  on the corner where the glass looked like it had cracked it was a lot worse
It is a mess and looks volcanic.

Thursday, July 31, 2014

MESH MELT, POT MELT


I made my own mesh using 1 inch thick fiber board with strips of 3/8th inch fiber papers strung across and secured by steel pins used in sewing.  I choose blue opaque with violet transparent and clear.  I used medium pieces of glass, going for big swaths of color, but I like it better with more mixing of colors and less separate blocks of color.  To fire it I used the following schedule:

500 dph...................................................1000 degrees..........................hold 30 mins
225 dph..................................................1225 degrees...........................hold 60 mins
Full..........................................................1595 degrees.........................hold 45 mins
Full..........................................................1475 degrees.........................hold 30 mins
Full............................................................900 degrees.........................hold 45 mins
100 dph......................................................700 degrees.........................off

The original firing schedule had me go up to 1600  degrees but I did 1595 instead.  You can see from the top picture that a lot of glass was still stuck to the mesh.  Additionally I had a few bubbles in the piece.  Thus I am not going to mess with original firing schedules until I try them first.  This piece was pretty, no black flakes in the glass from the stainless steel screen that I have.  I did knowingly use less glass than I was supposed to because I wanted to be conservative and so it came out a little uneven.  So I have ground the edges of the piece, it still isn't much of a circle and tomorrow I will fire polish it, using this schedule:
150 dph................................1000 degrees.................................hold 30 mins
Full.......................................1400 degrees.................................-0-
Full.........................................900 degrees.................................hold 60 mins
50 dph....................................800 degrees..................................-0-
100 dph..................................700 degrees..................................-0-
Off

and then I will add a layer of clear glass to the bottom, and fire it to a full fuse using a ramp of 100 dph for segment 1.  The firing schedule is as follows:

100 dph.................................................1000 degrees..........................hold 30 mins
225 dph..................................................1225 degrees.........................hold 60 mins
Full .......................................................1475 degrees..........................hold 20 mins
Full.........................................................900 degrees...........................hold 45 mins
50 dph.....................................................800 degrees..........................-0-
100 dph...................................................700 degrees..........................-0-
Off

Thank goodness for time to think.  I read my instructions over again and saw the steps for putting a transparent rim on your finished mesh melt.  The first step is to grind the piece after the melt to get rid of uneven edges.  The second step is to full fuse that piece on your piece of glass which is 1/2" larger than your piece and the third step would be to slump it, if that was the way you wanted to go.
I am currently fire polishing the piece after grinding its edges trying to see if the fire polish, which apparently works only on the surface, will get rid of the big bubbles which are now on the top of my piece.  If, as I am hoping, the fire polishing gets rid of the bubbles I will slump this piece and put a rim on my next piece.

It did not get rid of the bubbles, but serendipitously Stephen Richards wrote the following in his blog.  I hopte to remember this:

When using textured glass there is a decision to be made on whether the smooth or textured side is up.

"Oddly, the largest, but thin bubbles occur when putting the smooth sides together. it seems that as the glass is not perfectly flat, it holds air within the fused piece.

The fewest bubbles seem to be promoted by placing the rough side down on all pieces. This is easy as cutting is done on the smooth side anyway, and so no reverse cutting is required. It seems that the rough side of the glass provides ways for the air to escape during the bubble squeeze although it does promote micro bubbles within the glass.

If more bubbles are desired, you can place the textured sides together. That seems to allow the majority of the air out, but still leaves the micro bubbles from both sheets.

I have had good results following the Bullseye recommendation to keep the smooth side up on all layers. "
So finally after some deliberation I have decided to try and grind the piece a little longer and then slump it.  Results to come. 

Ok, the bubbles remained.   I have tried to grind it to a more perfect circle but it is quite far away from that so I will slump it in 
 6 x 1-3/4 Ball Surface Slumping MoldThis is relatively deep, so i will use a hold time of 15 mins.  Otherwise the schedule goes as follows:

150 dph..........................1000 degrees.......................hold 30 mins
100 dph.......................... 1200 degrees......................hold 15 mins
Full..................................900 degrees.......................hold 1 hour
50 dph..............................800 degrees.......................-0-
100 dph.............................700 degrees....................-0-
Off


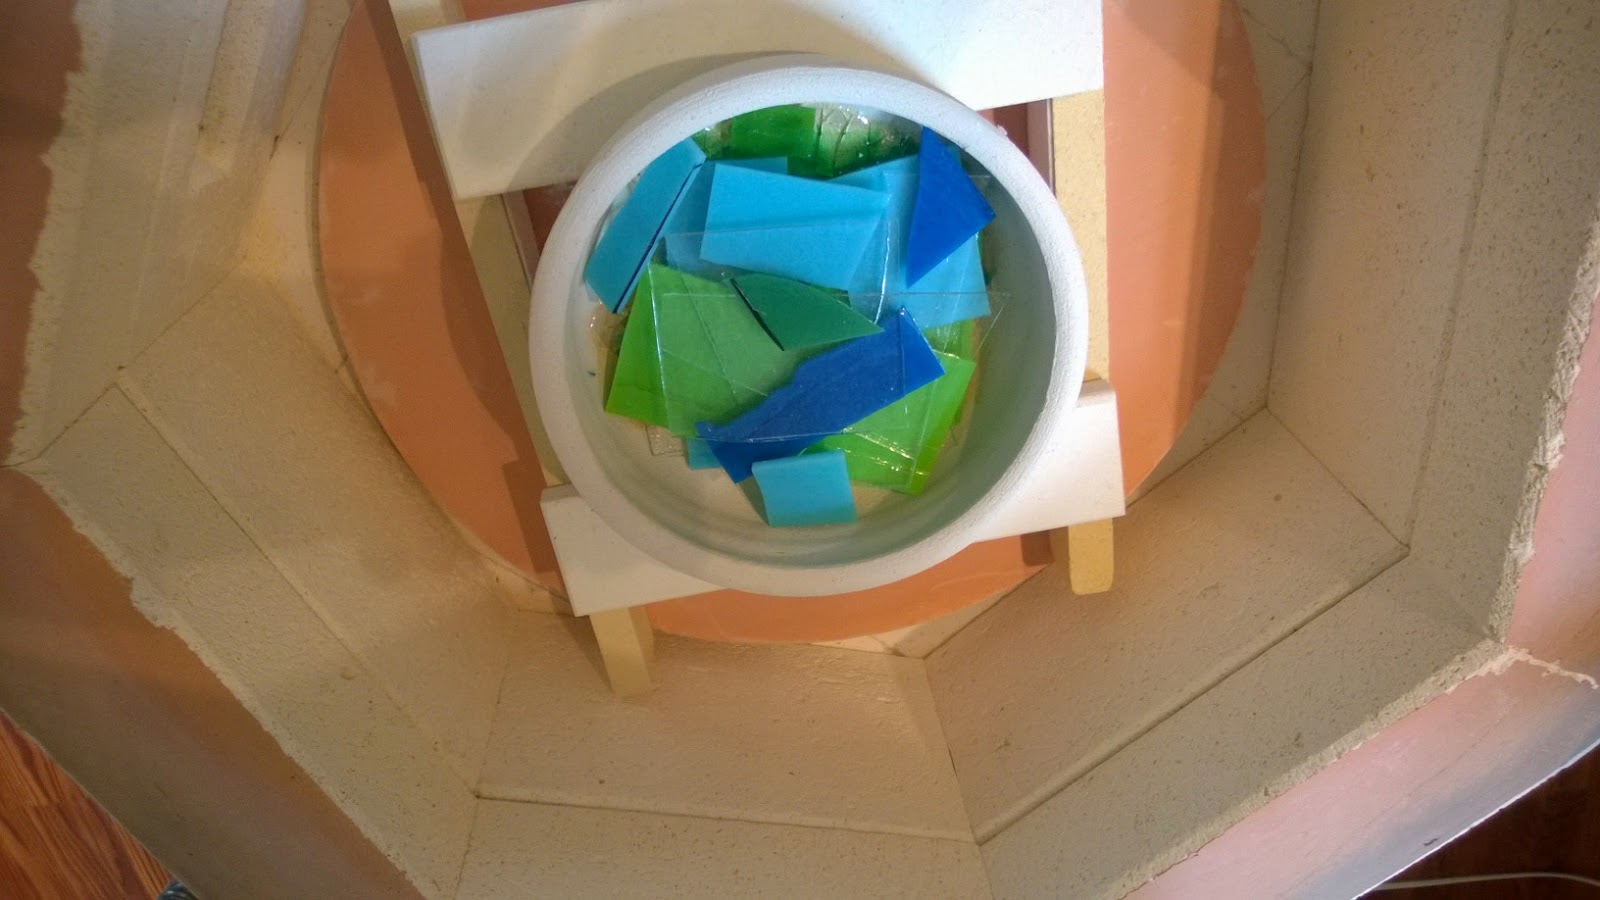
 I have great hopes for this pot melt.  I broke down and bought some pots because these are only 2 inches high and so can be put on supports and still not be too high for my shallow kiln.  There are 6 holes and it is about a 6 1/2 inch diameter circle by 2 inches high.  I am putting a little over 10 ounces of blue and green transparent along with clear glass, elevated somewhat off the kiln shelf.  On the shelf I have a 6 1/2 inch diameter circle of clear glass 2mm thickness over thin fire paper.  My shelf's kiln wash is a little rough in some places and I did not want to re-coat it with kiln wash just now.  I will be using the following firing schedule tomorrow;

250 dph.....................................1100 degrees..........................hold 15 mins
450 dph......................................1680 degrees.........................hold 1 hour
Full.............................................1520 degrees.........................hold 15 mins
Full ............................................  900 degrees..........................hold 3 hours 
100dph..........................................800 degrees..........................hold 1 hour
100 dph.........................................650 degrees..........................hold 15 mins
off 

Pretty, but a corner of it broke off.  I think that was because it came in contact with one of the posts that was holding out the pot melt pot.  I will try to grind it down to a better shape, soak it in vinegar water, and fire polish it and then slump. 

NEXT POT MELT


  I fired it using the firing schedule on Bonny Dune Molds Pot Melt Tutorial and it came out well with only a few bubbles.  I wish I could get rid of those and will keep looking for some option.  Fired it as follows:

250 dph...............................1100 degrees.....................hold 15 mins
450 dph...............................1685 degrees......................hold 1 hour